Command-Line Session for AMD SoC Devices
Obtain the IP address of your AMD® SoC device, and verify serial port communication to your AMD SoC device by using a command-line session with the AMD SoC device.
You can use this optional procedure to:
View the standard output while the hardware boots.
Get or set the IP address, as described in Get IP Address of AMD SoC Devices.
If you have multiple AMD SoC platform boards connected to your host computer, disconnect the ones you are not using.
Identify COM Port
Determine the COM port number, assigned to the USB UART connection of AMD SoC platform by the development computer:
In Windows®, open Devices and Printers.
Locate the USB device that connects to the SoC platform, such as Cypress Serial or Silicon Labs CP210x USB to UART Bridge. The device name includes the port number.

Open Serial Connection
Open a serial connection to the device using a terminal software, such as PuTTy:
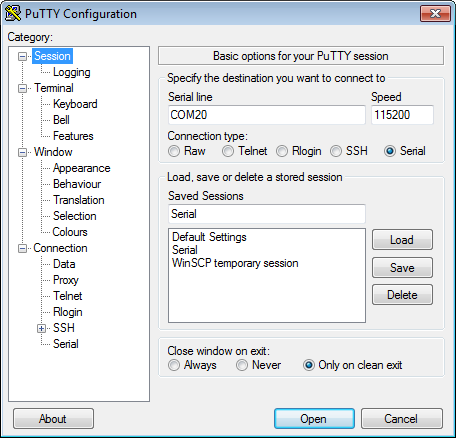
In the PuTTy configuration window, select the Serial category.

Enter the following values:
Serial line to connect to: Enter the COM port number.
Speed:
115200Flow control:
None
Select the Session category.

In Connection type, select
Serial.In Saved Sessions, enter a new name, such as
Serial.Click Save, and then click Open.
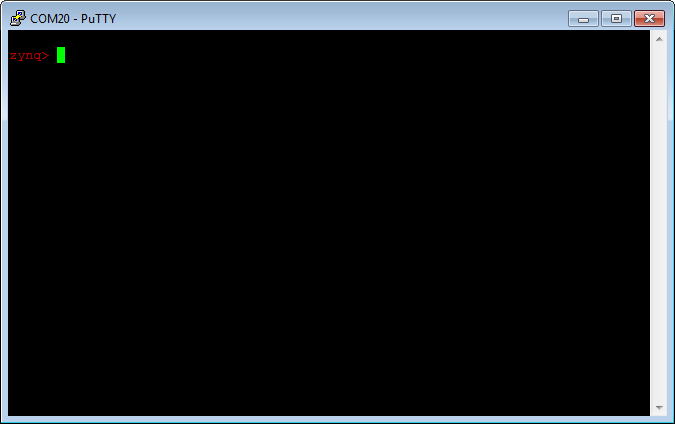
When a terminal window opens, press the Enter key on your keyboard. The terminal window displays a Linux® command prompt.

Get Platform IP Address
To get the AMD SoC platform IP address at the Linux command line:
At the Linux command line, enter:
ifconfigLocate the
eth0device and get the value ofinet addrfrom the command-line output. For example:zynq> ifconfig eth0 Link encap:Ethernet HWaddr 00:0A:35:00:01:22 inet addr:172.28.144.60 Bcast:172.28.144.255 Mask:255.255.255.0 UP BROADCAST RUNNING MULTICAST MTU:1500 Metric:1 RX packets:26581 errors:5 dropped:0 overruns:0 frame:0 TX packets:106 errors:0 dropped:0 overruns:0 carrier:0 collisions:0 txqueuelen:1000 RX bytes:2953666 (2.8 MiB) TX bytes:11772 (11.4 KiB) Interrupt:54 Base address:0xb000 lo Link encap:Local Loopback inet addr:127.0.0.1 Mask:255.0.0.0 UP LOOPBACK RUNNING MTU:16436 Metric:1 RX packets:0 errors:0 dropped:0 overruns:0 frame:0 TX packets:0 errors:0 dropped:0 overruns:0 carrier:0 collisions:0 txqueuelen:0 RX bytes:0 (0.0 B) TX bytes:0 (0.0 B)To confirm the connection to the platform, see Send PING Request to AMD SoC Devices.
When you are finished, close the terminal window.
Note
Leaving the terminal session open prevents the build process from connecting to the AMD SoC platform and produces a build error.
Open SSH Connection
Open an SSH connection to the platform using a terminal software, such as PuTTy:
To configure the PuTTy for SSH connection, select Session.

Enter the following values:
Host Name (or IP address): Enter the
inet addrof the device.Port:
22
For Saved Sessions, enter a new name, such as
SSH.Click Save, then Open.
When a terminal window opens, login as the user
rootwith passwordroot. The terminal window displays a Linux terminal.
Close the terminal session.
Note
Leaving the terminal session open prevents the build process from connecting to the AMD SoC platform and produces a build error.
At the MATLAB® command prompt, create a hardware object.
z = zynqrfsocnetwork
z =
  zynqrfsocnetwork with properties:
    IPAddress: '192.168.1.101'
Check the connectivity.
z.checkConnection
'Connection successful'
See Also
Get IP Address of AMD SoC Devices | Send PING Request to AMD SoC Devices