Create Function Call Sequence Assessments
R2026bA function call sequence assessment verifies the order in which your code under test
calls other functions. Use call sequence assessments when the order of function calls is
important. In this example, you verify that a communication driver calls
comm_open, comm_configure,
comm_transmit, and comm_close, in this
order.
Each test step, whether tabular or scripted, can have one call sequence assessment consisting of:
An ordered list of functions that you expect to be called.
Optional input parameter assessments for each function in the sequence. Input parameter assessments allow you to check the arguments passed to each function call against an expected value or range of values.
A function call sequence assessment fails when:
The functions are not called in the expected order.
One or more of the input parameter assessments fail.
Note
Function call sequences are strict. Once you include a function in the call sequence, the assessment checks for all calls to that function. If the function is called before, after, or in between the expected calls you specify, the call sequence assessment fails.
Example Files
This tutorial uses the files in the folder
polyspaceroot\polyspace\examples\doc_pstest\call_sequence\srcpolyspacerootC:\Program
Files\Polyspace\R2026b.
These files define and implement a communication driver with a protocol that requires functions to be called in a specific order.
To continue with this tutorial:
Create a new Polyspace Platform project and add the
srcfolder to the project.Click Parse Code on the toolstrip to analyze the files in the folder.
Create a Call Sequence Assessment
In this example, you write a test for the function send_message() and add a call sequence assessment to verify that it calls its internal functions in the correct order.
On the Projects pane, right-click
send_messageand select Add Test Case.In the Inputs section, set the values for these input variables:
Set
portto2.Set
baud_rateto115200.Set
lengthto3.
For the input parameter
data, create a pointer target. To do so, right-click thedatarow in the Inputs table and select Add Pointer Target. In the Add Pointer Target dialog box, accept the default name, set the size to3, and click OK. Click the link in the Value column to navigate to the Test Data section of the test. Specify the values0xAA,0xBB, and0xCC: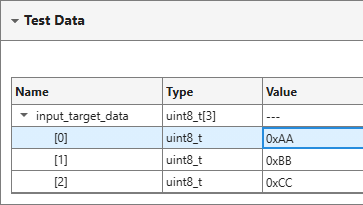
In the Call Sequence Assessment section, click the Add button
 to select functions from the list of
available callees. Hold Shift and select all four
functions. Click OK to add the functions to the call
sequence.
to select functions from the list of
available callees. Hold Shift and select all four
functions. Click OK to add the functions to the call
sequence.Drag and drop the function cards into this order:
comm_opencomm_configurecomm_transmitcomm_close
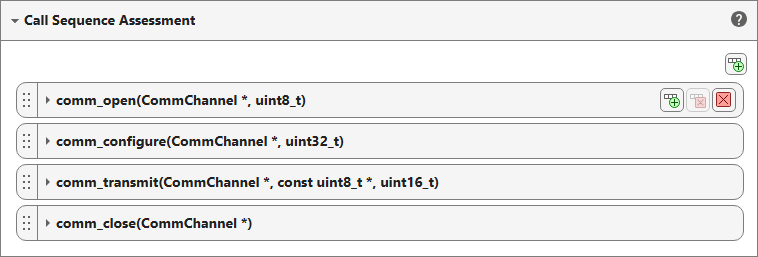
Expand the
comm_opencard to view the input parameter assessments. Assessments are automatically added, but are disabled by default for each input to the function. Enable the assessment for theportparameter and set the expected value to2.
For the
comm_configurefunction, enable the assessment forbaud_rateand set the expected value to115200. Forcomm_transmit, enable the assessment forlengthand set the expected value to3. Do not enable any input assessments forcomm_close.Build and run the test. Then, open the Review perspective and select the test case in the Results List. The Result Details pane shows the test results.
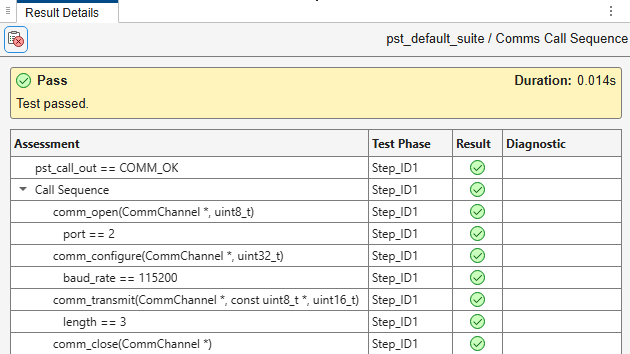
Green checks indicate passing assessments. For more information on:
Building and running tests, see Build and Run Tests in Polyspace Platform User Interface.
Reviewing function call sequence test results, see Review Function Call Sequence Assessment Results.
See Also
polyspace.project.CallSequenceAssessment

