Back-to-Back (MIL/SIL) Equivalence Testing an Atomic Subsystem
This example shows how to create and run a back-to-back test, which is also known as an equivalence test, for an atomic subsystem.

Generate Code for the Model
Open the model, configure the system on which you are running Simulink, and generate code for the whole model.
model = 'sltestMILSILEquivalence';
open_system(model);
% Configure for code generation
if ismac
    lProdHWDeviceType = 'Intel->x86-64 (Mac OS X)';
elseif isunix
    lProdHWDeviceType = 'Intel->x86-64 (Linux 64)';
else
    lProdHWDeviceType = 'Intel->x86-64 (Windows64)';
end

set_param(model, 'ProdHWDeviceType', lProdHWDeviceType);
slbuild(model);
### Searching for referenced models in model 'sltestMILSILEquivalence'.
### Total of 1 models to build.
### Starting build procedure for: sltestMILSILEquivalence
### Successful completion of build procedure for: sltestMILSILEquivalence

Build Summary

Top model targets:

Model                    Build Reason                                         Status                        Build Duration
==========================================================================================================================
sltestMILSILEquivalence  Information cache folder or artifacts were missing.  Code generated and compiled.  0h 0m 21.641s

1 of 1 models built (0 models already up to date)
Build duration: 0h 0m 23.726s
Create a Back-to-Back Test Using the Test Manager and Test For Model Component Wizard
1. Open the Test Manager.
sltest.testmanager.view;
2. Click New > Test For Model Component.

3. Click the Use current model icon ![]() to add the
to add the sltestMILSILEquivalence model to the Top Model field. Select Controller and click the plus sign. Then click Next.

4. Select Use component input from the top model as test input. Then click Next.

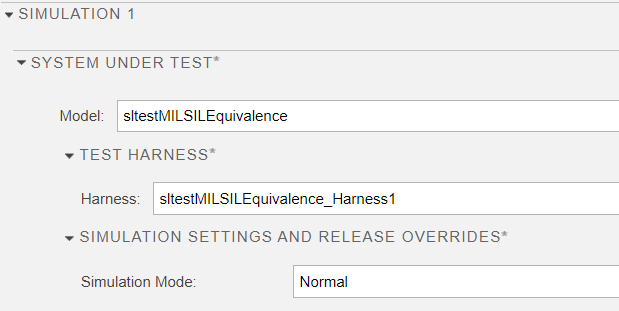
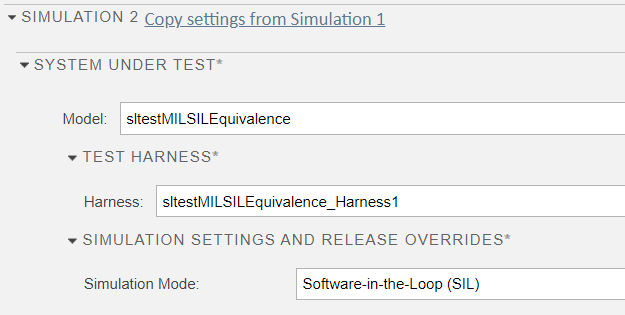
5. Select Perform back-to-back testing. Check that Simulation1 is set to Normal and Simulation2 is set to Software-in-the-Loop (SIL). Then click Next.

6. Leave the default values for saving the test data and generated test:
Select test harness input source:
Inports,Specify the file format:
MATSpecify location to save test data: sltest_sltestMILSILEquivalence
Test File Location: sltest_
sltestMILSILEquivalence_tests
Then, click Done. The Create Tests for Model Component generates the back-to-back (equivalence) test and then returns to the Test Manager.

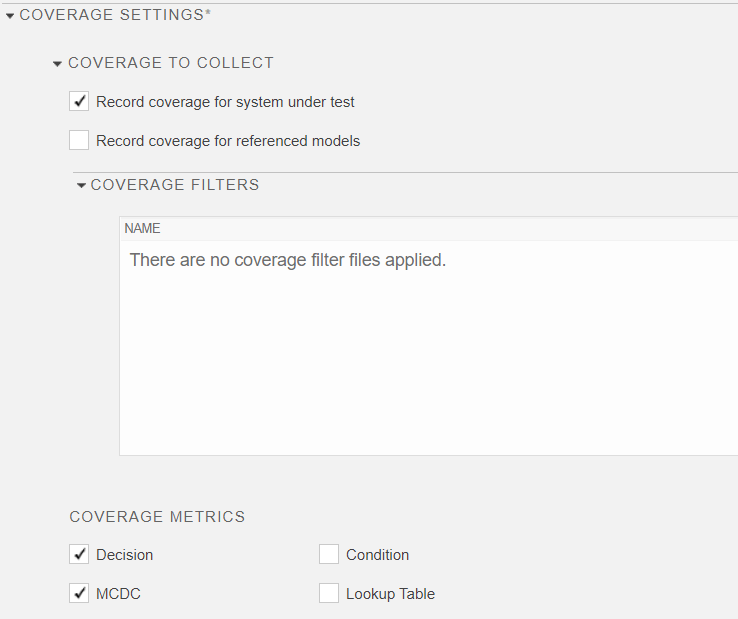
7. In the Test Manager Test Browser pane, select the test file, sltest_sltestMILSILEquivalence_tests. Enable coverage collection by expanding the Coverage Settings section. Under Coverage to Collect, select Record coverage for system under test. Under Coverage Metrics, select Decision and MCDC. Coverage assesses the completeness of a test.

8. Select the sltestMILSILEquivalence_Harness1 test case. Expand the Simulation 1 and Simulation 2 sections and their System Under Test and Simulation Settings and Release Overrides subsections to see the settings.


Run the Test and View the Results
1. Click Run in the Test Manager toolbar.
2. When the test run completes, in the Results and Artifacts pane, select Results and view the Aggregated Coverage Results section. Both the Normal and SIL simulations have 100% coverage, which indicates that testing is complete for the selected model coverage metrics.

3. Expand the Results hierarchy and select Out1:1 under Equivalence Criteria Result. The difference between the Normal and SIL simulations is zero, which shows that both simulations produce the same results.

Close the Model and Clear and Close the Test Manager
close_system(model,0)
sltest.testmanager.clear
sltest.testmanager.clearResults
sltest.testmanager.close