Explore and Simulate a Simple Scenario
In this example, you explore a sample scenario in the RoadRunner Scenario interactive editor to learn the basics of scenario design and simulation. This example assumes that you have prior knowledge of working with RoadRunner, and that you have already created a project. For more details, see Get Started with RoadRunner and RoadRunner Project and Scene System. If this is your first time working with RoadRunner Scenario, consider reading RoadRunner Scenario Fundamentals first.
Open Scenario
Open the sample scene and scenario used in this example.
Open the RoadRunner application and, from the start page, select Open Project.
In the
Scenestab of the current project, double-click theScenarioBasic.rrscenescene. RoadRunner Scenario opens the scene in the editing canvas.Switch to scenario editing mode. From the top-right corner of the RoadRunner application, select Scene Editing, then Scenario Editing.

From the File menu, select Open Scenario into Current Scene.
Navigate to the
Scenariosfolder of the current project and select theTrajectoryCutIn.rrscenarioscenario. RoadRunner Scenario opens the scenario in the editing canvas.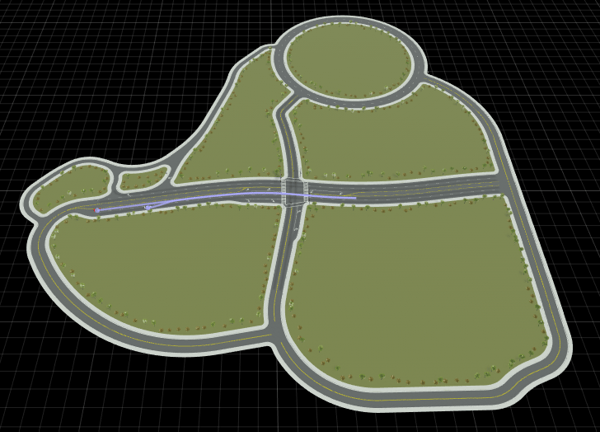
Tip
To avoid overwriting the original scenario, create and work with a copy of the scenario. From the File menu, select Save Scenario As. Name the scenario
MyScenario.rrscenario.
In Scenario Editing mode, the dynamic scenario elements, such as the vehicles and their paths, are active for editing. The static scene elements, such as the roads and trees, are locked. To switch between editing the scenario and the scene, use the yellow Scene Editing or Scenario Editing toggle in the upper-right corner of the RoadRunner application.
Simulate Scenario
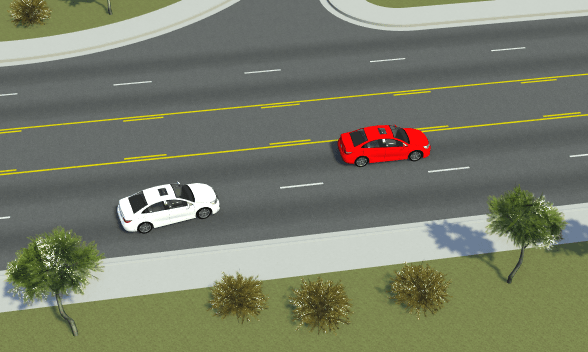
This scenario contains a white sedan named Ego and a red sedan
named Lead. The vehicles follow predefined driving paths during
simulation. Simulate the scenario and observe how the vehicles interact.
From the RoadRunner Scenario menu, click the Simulation Tool
 on the RoadRunner Scenario toolbar.
In the Simulation pane on the right, click Play.
Note
If the simulation runs too quickly, use the slider in the Simulation pane to slow down the pace of the simulation.
In this scenario, the red sedan begins driving immediately. The white sedan begins driving after some delay and then cuts into the lane of the red sedan. Shortly after the cut-in, the red sedan speeds up and, upon reaching a target speed, slows to a stop. The white sedan, after the cut-in, drives behind the red sedan and matches the speed of the red sedan until it comes to a stop.
During simulation, the scenario elements become locked for editing. When you are done simulating, switch back to scenario editing mode by clicking the Scenario Edit Tool
 on the RoadRunner Scenario toolbar.
Modify Vehicles
Vehicles in RoadRunner Scenario are available from the Vehicles folder of the
Library Browser. Try adding or modifying vehicles, and then
switching to the Simulation Tool to observe the effects on
simulation. The table lists some sample vehicle modifications.
| Description | Example |
|---|---|
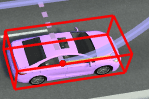
Change the color of a vehicle by selecting a vehicle and then selecting a new color from the Attributes pane.
Note Not all vehicles have their colors visualized in the scenario editor, but their color values are included on export.
| This image shows a sedan that has had its color changed from white to pink.
|
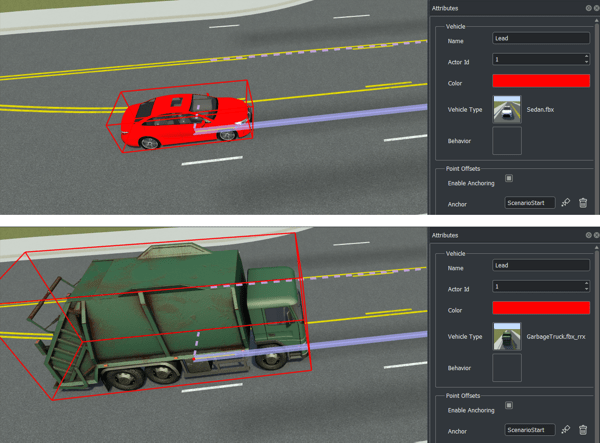
Change the type of a vehicle by selecting a vehicle and then dragging a new vehicle asset from the Library Browser onto the Vehicle Type image thumbnail in the Attributes pane. Additional vehicle types are available with Vehicle Assets. | This image shows the red sedan changing to a garbage truck.
|
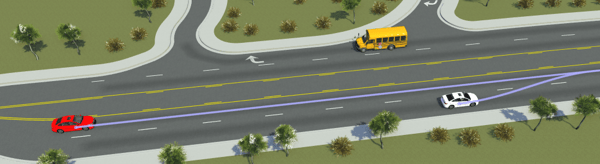
Add a new vehicle by dragging a vehicle asset from the Library Browser into the scenario editing canvas. During simulation, vehicles without driving paths follow their lanes by default. | This school bus drives on its own and turns right at the exit during simulation.
|
Modify Driving Paths
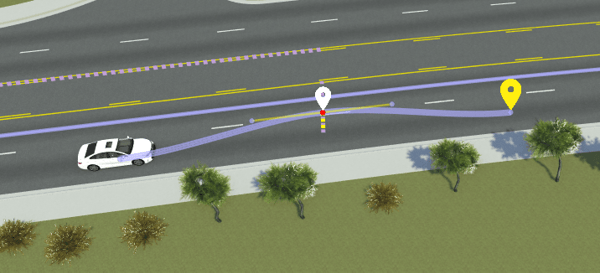
When you select a driving path, the path turns red. The final waypoint appears as a yellow pinpoint icon, and intermediate waypoints appear as white pinpoint icons. Try modifying the driving paths in the scenario, and then switch to the Simulation Tool to observe the effects on simulation. The table lists some sample driving path modifications.
| Description | Example |
|---|---|
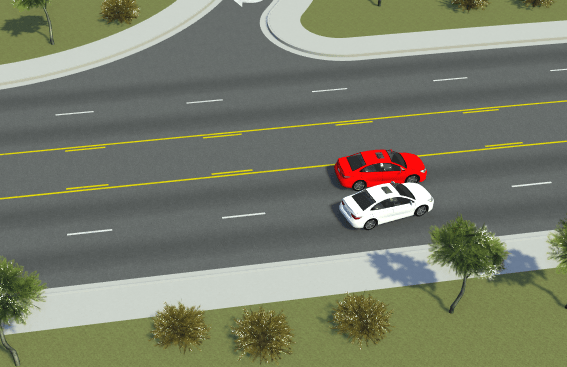
Click and drag vehicles to change their starting position in the simulation. The driving paths automatically update to reflect the road and lane shapes at the new starting position. | Dragging the white sedan changes the point at which it starts its cut-in, which can cause the simulation to end in collision.
|
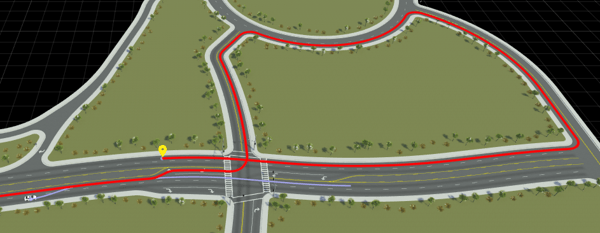
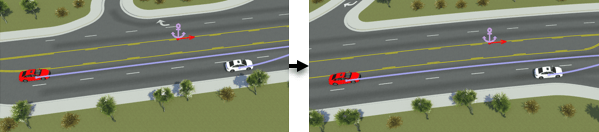
Change driving paths by clicking and dragging the last waypoint in the path. By default, driving paths follow the center lanes and follow the traffic laws of the road network, so moving the path to certain lanes can dramatically change its length. To extend a path with new waypoints, select the path and then right-click in the scenario. You can also split a path by right-clicking within a path segment to form new waypoints. | When you move the last waypoint of the red sedan into an opposing lane, the path makes a loop so that the sedan can turn around and drive in the opposite direction.
|
Create free-form paths by selecting path segments and then selecting Freeform in the Attributes pane. | If you specify a path segment as free-form, then you can specify a path using a series of waypoints. You can have the path move into an opposing lane without obeying traffic laws or have the path go off the road.
|
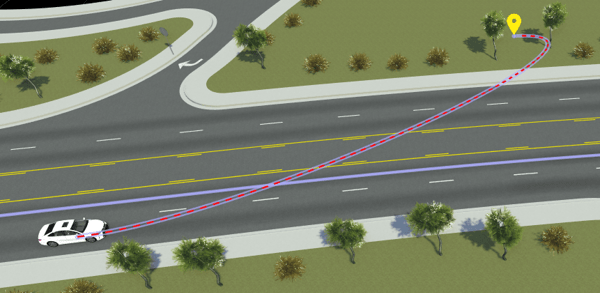
Change the position of a vehicle within its lane by selecting a path waypoint and updating the Lateral Offset value in the Attributes pane. | The white sedan veers to the left within its lane. It has a
path waypoint with a Lateral Offset value of
|
Modify Scenario Anchors
RoadRunner Scenario uses an anchoring system to specify the relative positions of objects. By moving objects designated as anchors, you can move an entire scenario to a new location in a scene.
Hide and show anchors for all actors in the scenario by clicking Show All
Anchors
![]() on the RoadRunner Scenario toolbar. Anchors are always displayed when you select an entity that
references them.
on the RoadRunner Scenario toolbar. Anchors are always displayed when you select an entity that
references them.
When you add objects to a road, they become attached to road anchors. In this
scenario, the vehicles are anchored to the ScenarioStart anchor on
the left side of the intersection. Try dragging this anchor. The vehicles and their
paths move along with it.
An anchor can also be a path waypoint or another vehicle. For example, select the
white sedan and observe that, in the Attributes pane, its
Anchor is set to the Lead actor. Now, try
dragging both vehicles.
When you drag the red sedan, the white sedan moves with it, because the red sedan is the parent anchor of the white sedan.
When you drag the white sedan, the red sedan does not move with it.