Multi-Robot Control with Resource Allocation and Conflict Management
This example shows how to control multiple robots working in a distribution center, as well as how to easily configure a distribution system. The robots navigate the facility and complete multiple tasks while leveraging algorithms from game theory to optimize task allocation between robots and resolving conflicts using a grid-based traffic manager. This example builds on the information covered in the Control and Simulate Multiple Warehouse Robots example, which navigates multiple robots around a similar facility, but this example uses custom algorithms.

This example uses a package-sorting scenario, in the multiRobotTaskingRouting model, which has been modeled in Simulink® using Stateflow® charts, SimEvents®, and Robotics System Toolbox™. The Allocation Manager subsystem in the Broker section of the model assigns tasks to the robots, directing them to pick and place objects within the warehouse across multiple pick and place stations. To achieve optimal assignments for each robot, this subsystem weighs the cost of completing each task for each robot. The Conflict Management & Dynamics subsystem plans the trajectories for the robots, resolves conflicts, and generates velocity commands for the robots. These commands connect to robots modeled using a differential-drive robot model, which execute the velocity commands and output the real-time poses of the robots. The model visualizes these poses and sends them to the Allocation Manager and Conflict Management & Dynamics subsystems, which selects the optimal robot to which to assign the next task.
Open the multiAgentTaskingRouting Simulink model, which models the scenario using world and broker communication with SimEvents.
open_system("multiRobotTaskingRouting")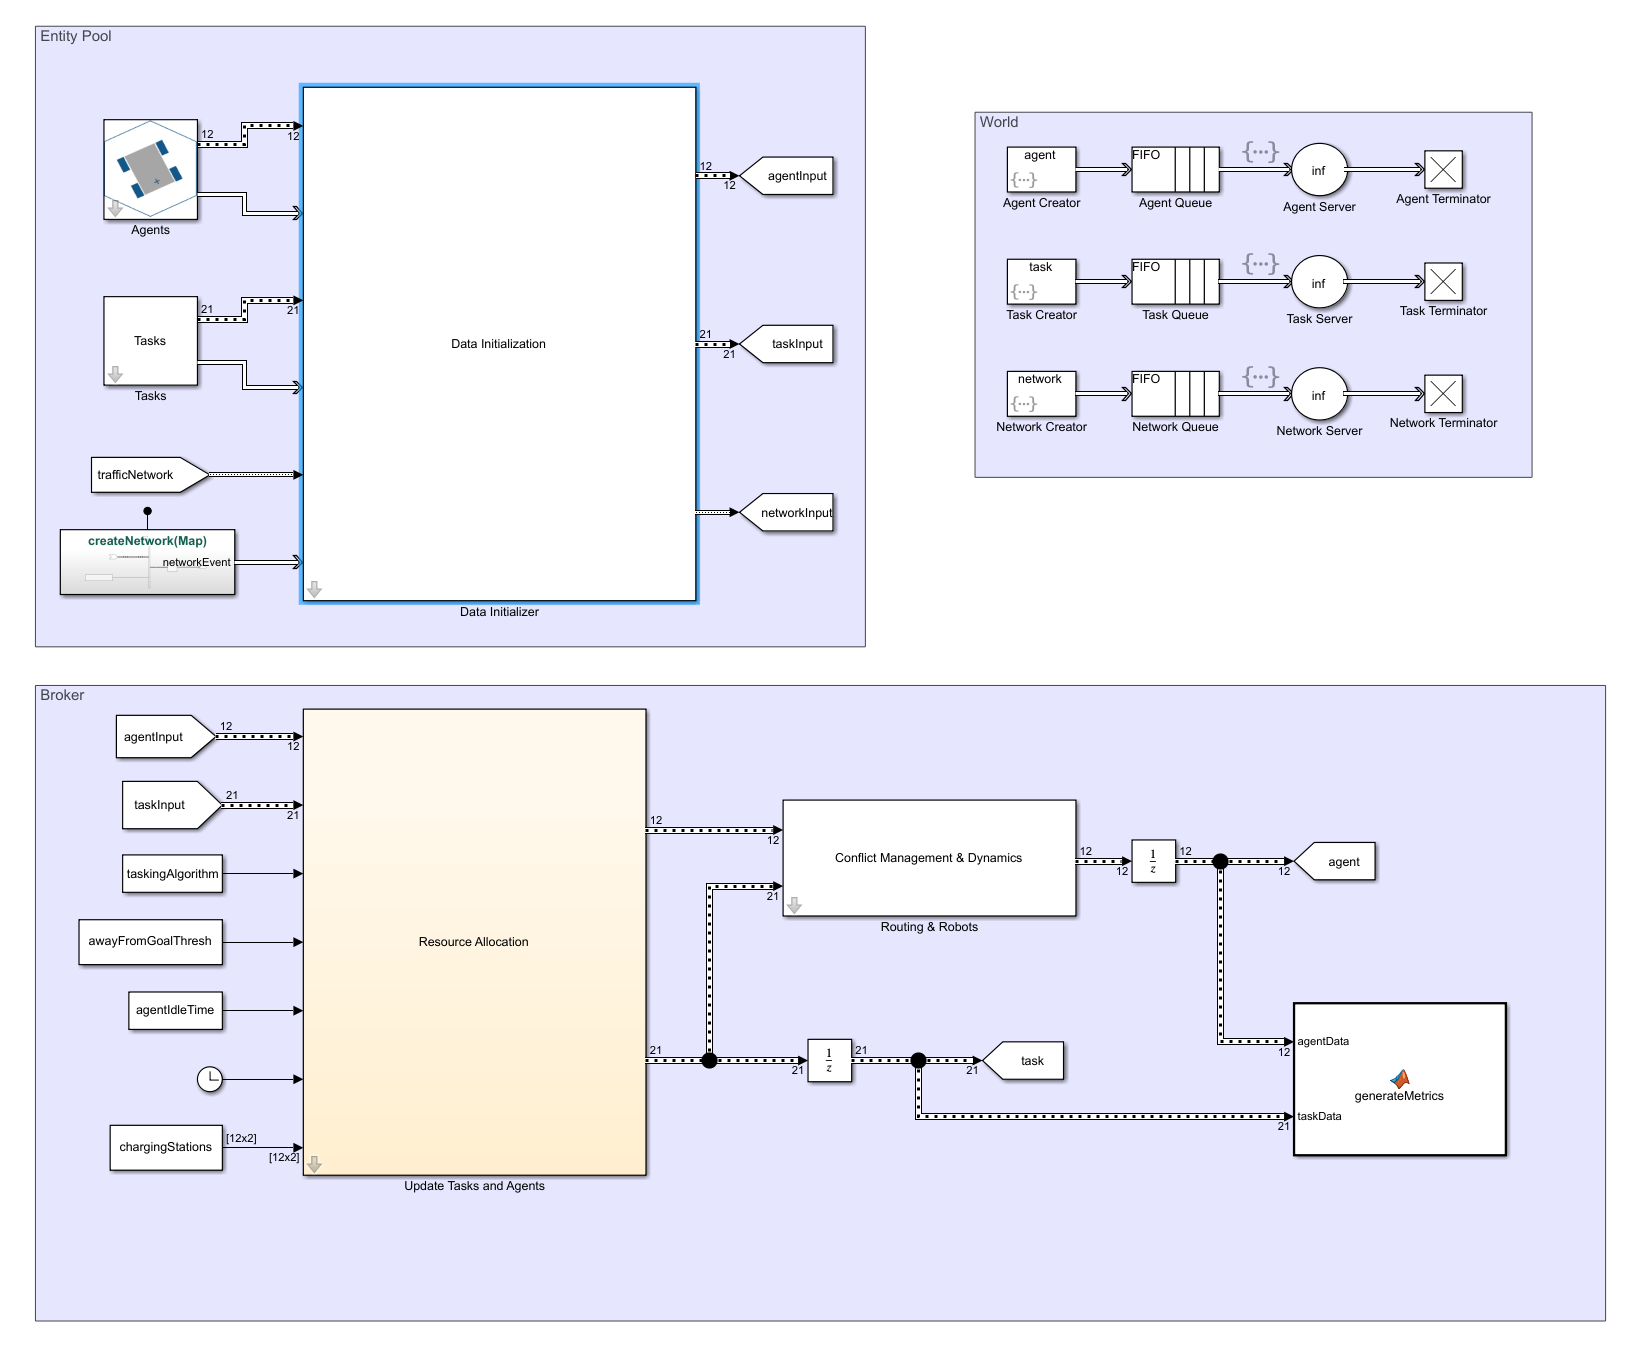
Allocation Manager
The Allocation Manager subsystem contains a manager to manage the tasks and the agents that complete those tasks. The Task Manager block is a Simulink Bus element that manages the status of each task. The element is defined and set up as part of the initialization process of the Simulink model, once the number of agents and packages have been defined.
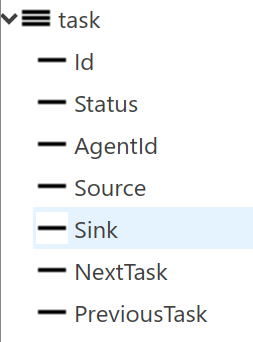
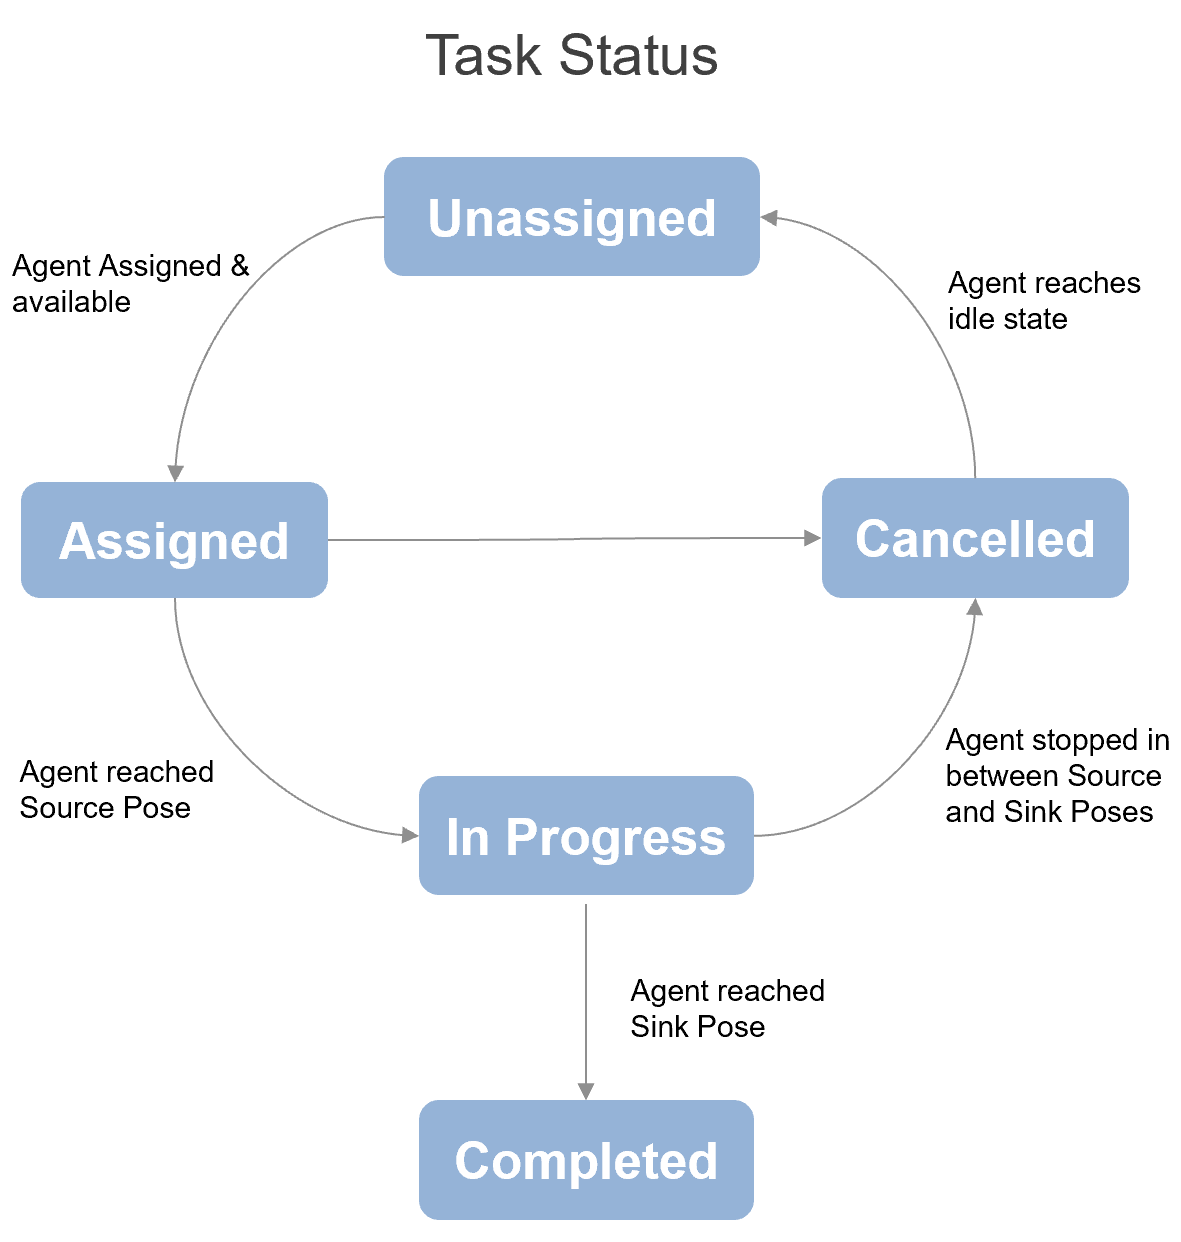
The Status property of the chart object task transitions through various states managed by a state machine that uses a Stateflow chart with this process:
If an agent is idle or reaches an idle state, they have no assigned task and wait for a task.
If the task manager assigns a task containing a source and sink pose to the agent, the agent attempts to reach the source pose first, and then the sink pose.
When the agent has reached both the source pose and sink pose, the task is complete.
If the task is canceled while the agent is attempting to reach either pose, the agent stops and returns to an unassigned idle state.
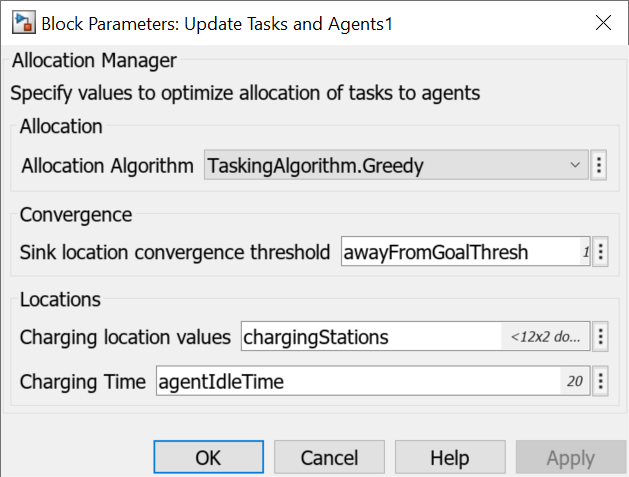
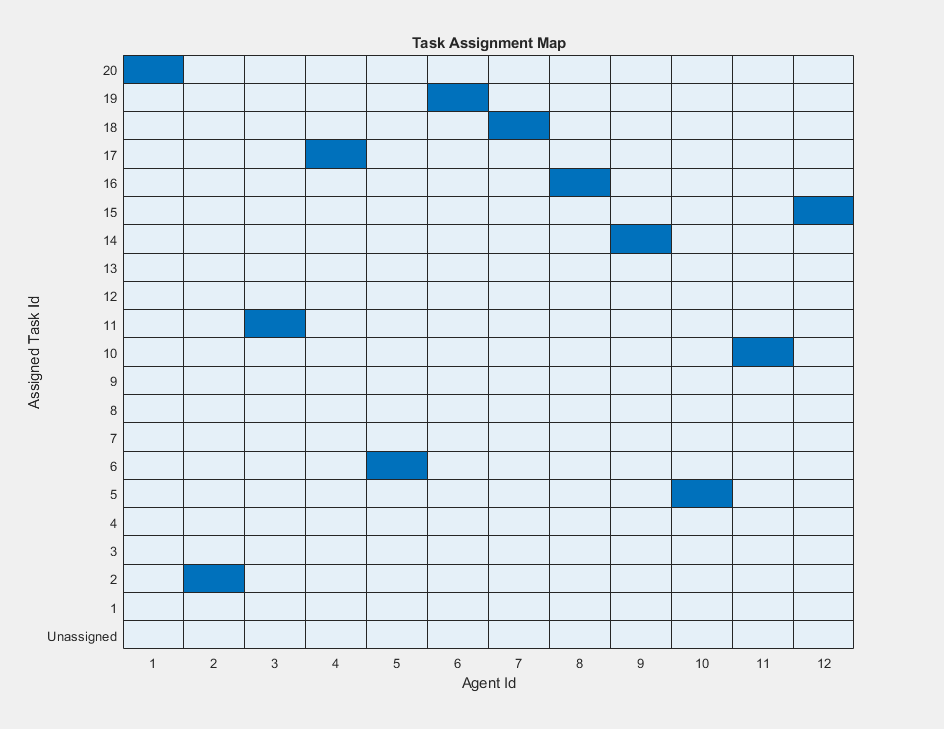
In the Unassigned state, the task assigner attempts to use a combinatorial algorithm, Greedy, Auction, or Munkres, to optimally assign tasks to any available robots. To set the algorithm, open the Allocation Manager subsystem mask and set the Allocation Algorithm parameter to TaskingAlgorithm.Greedy.
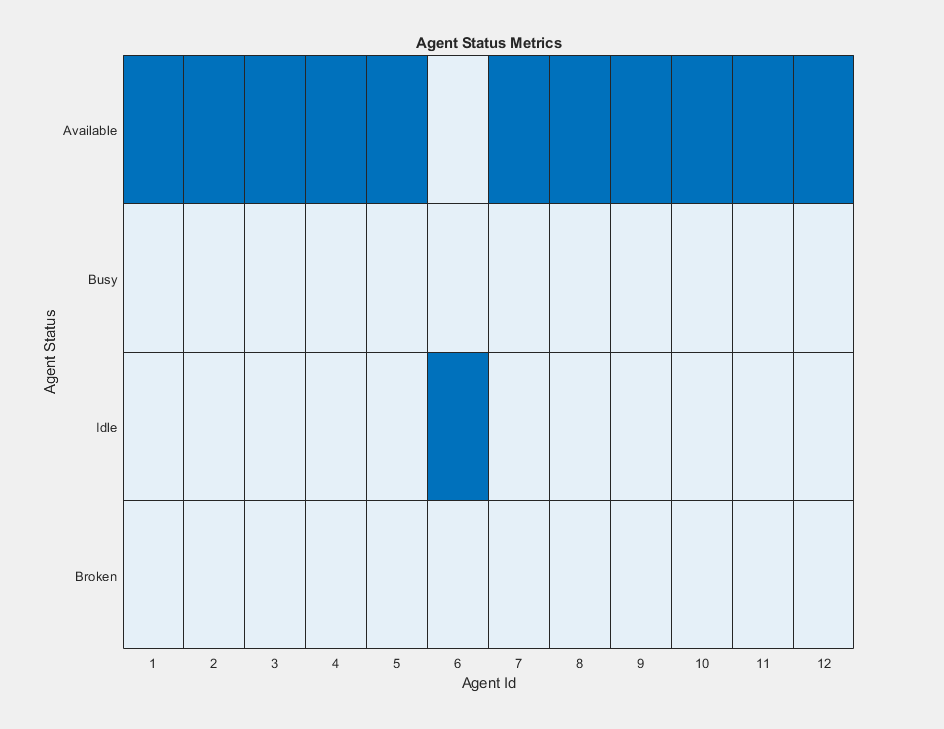
Each robot is represented as an agent, defined as a Simulink Bus element in the model initialization script.
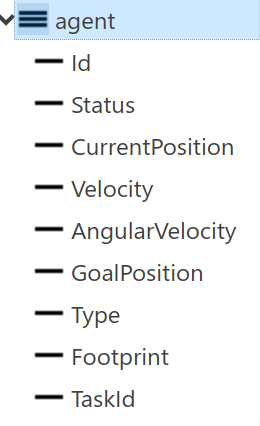
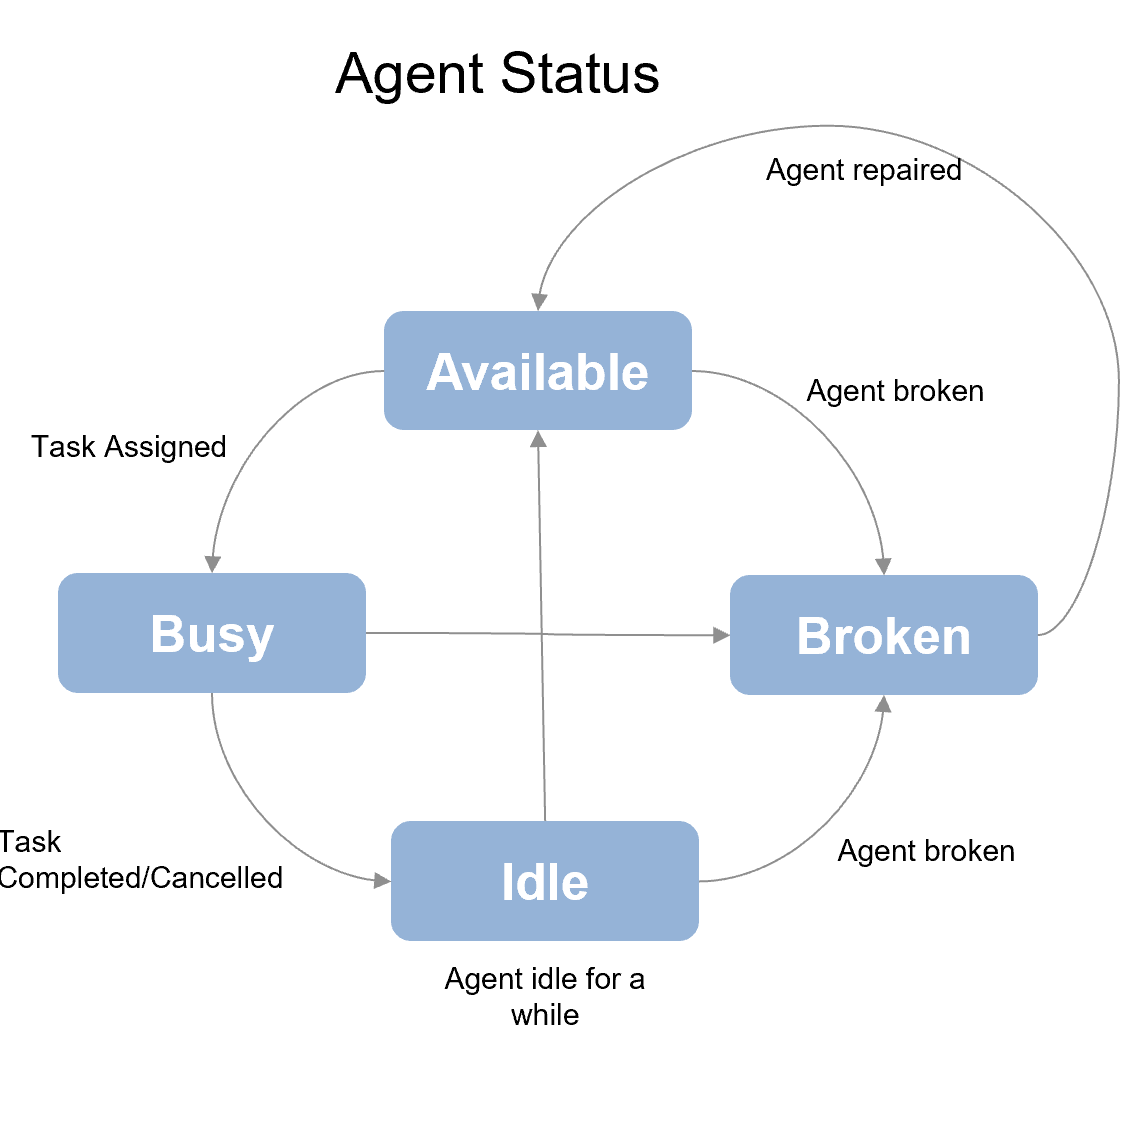
The Status property of the chart object agent transitions through various states managed by a state machine that uses a Stateflow chart with this process:
The agent has no task assigned, and is available.
The task manager assigns the agent a task.
The agent remains busy until it completes the task, and becomes both idle and available.
If the agent becomes broken, it remains in the broken state until repaired by a technician.
If a broken agent is repaired, it again becomes available.
Create Environment
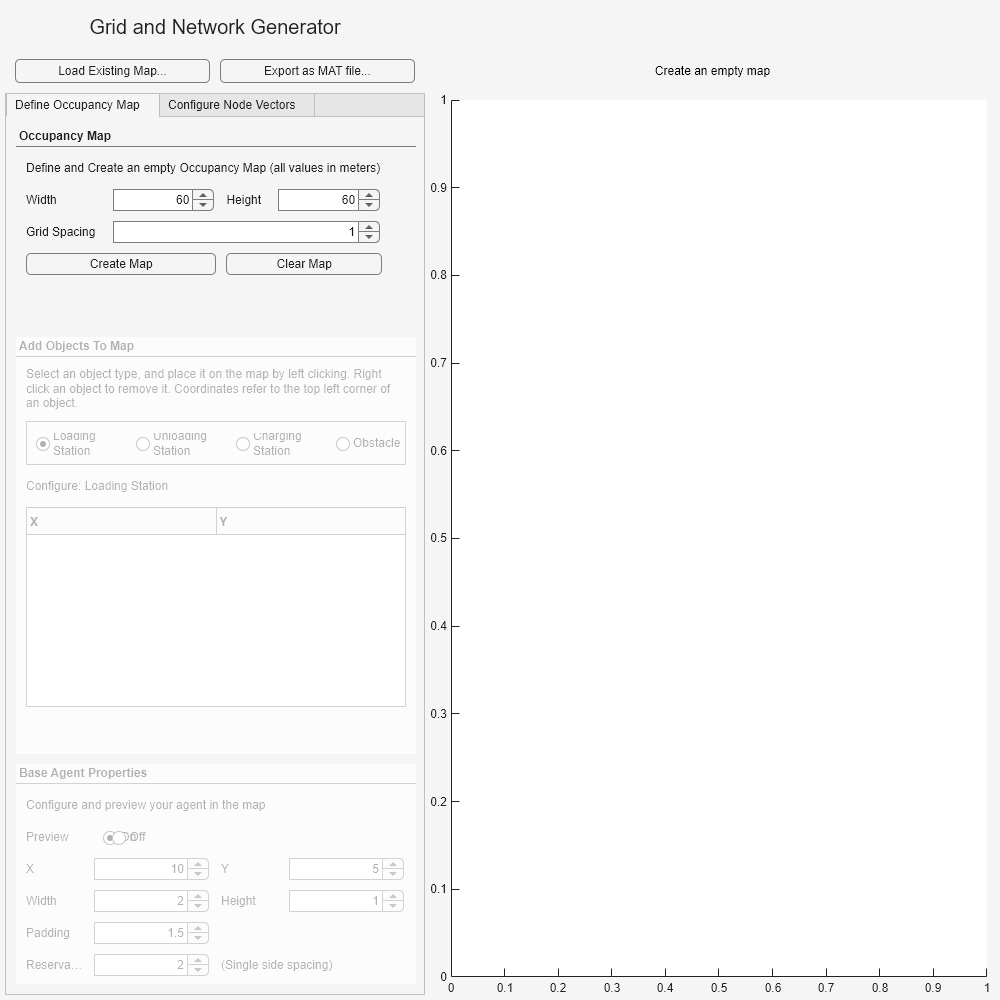
Before performing conflict management between the agents, you must define the environment. The WarehouseMapEditor helper function launches a UI that enables you to create an occupancy map and modify it by adding or removing loading, unloading, and charging areas, as well as obstacles. Run the helper function to open the UI and create a map.
WarehouseMapEditor
ans =
  WarehouseMapEditor with properties:

             Name: ''
            Title: ''
        CloseMode: 'cancel'
        IsVisible: 1
    IsWidgetValid: 1
First, specify the basic values for an occupancy map. Click Create Map to create the map in the plot pane. By default, the map is 60-by-60 meters. You can use the controls in the Add Objects to Map pane to define the locations of loading stations, unloading stations, charging stations, and obstacles. You can use the Base Agent Properties pane to configure the robots.
Click Load Existing Map and select customWarehouseMap.
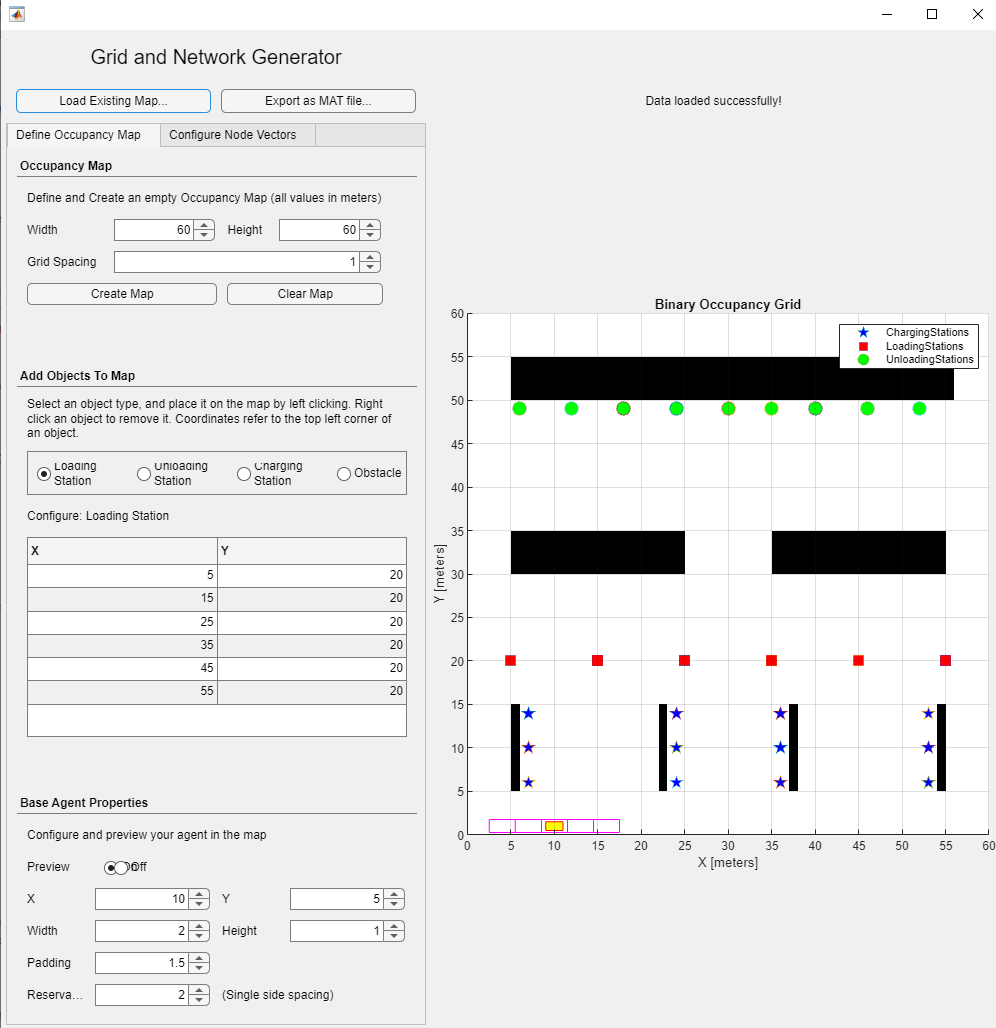
The map is a matrix of logical values contains all the information for the occupancy map, such as the locations of obstacles and charging stations.
Conflict Management
Once the Allocation Manager subsystem assigns specific tasks to the robots, the next step is to plan routes for them to travel from their source to target locations. Using the conflict manager, you can now plan multiple paths for the robots by minimizing their cost to reach the target locations. To find the optimal paths, you can use any basic path-planning algorithm, such as A*, or Dijkstra. In this example, you use the A* algorithm for path planning in the grid while managing conflicts among the agents and updating the costs.

Simulation
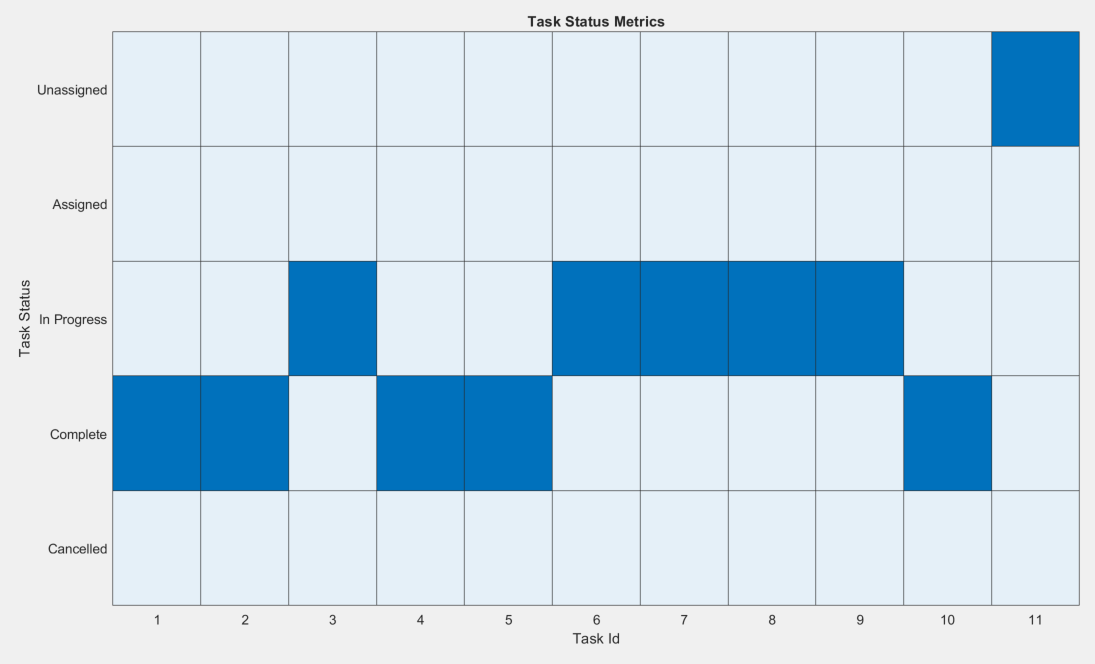
Run the model to observe the metrics for your system.
sim("multiRobotTaskingRouting");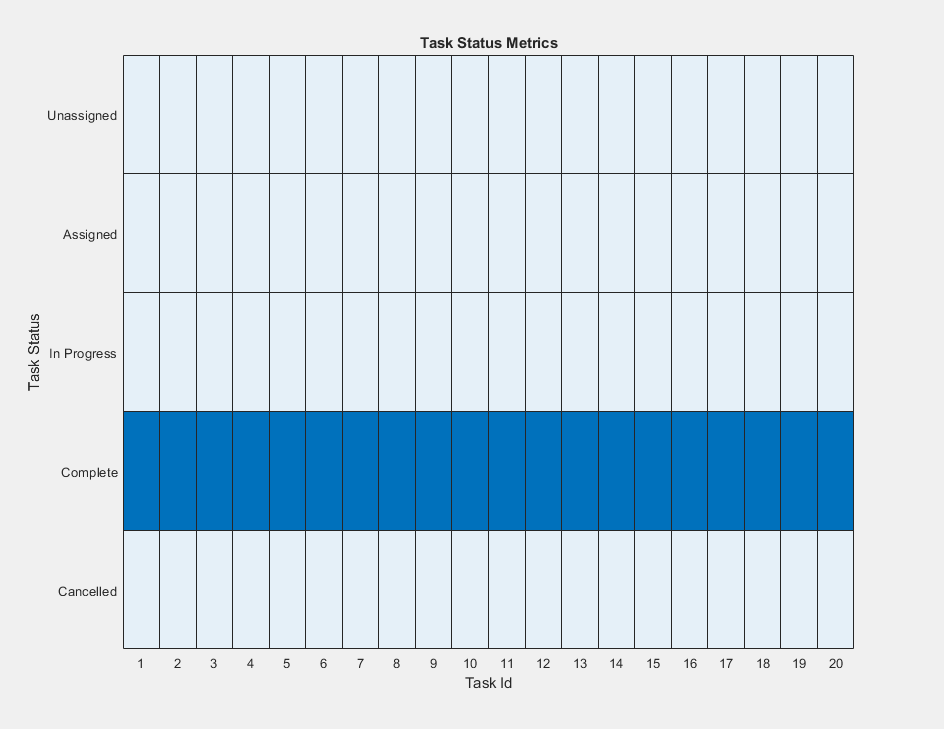
![Figure contains an axes object. The axes object with title Mobile Robot Motion, xlabel X [meters], ylabel Y [meters] contains 196 objects of type patch, line, image, text, rectangle.](../../examples/robotics/win64/MultiAgentWithResourceAllocationAndConflictManagementExample_14.png)
Close the model.
close_system("multiRobotTaskingRouting",0)