A Simulink Library for Drilling Modeling, Simulation, and Control
Rajat Dixit, ExxonMobil
Mitigating drill string vibrations requires detailed and accurate information on downhole parameters. This data is not always available due to slow telemetry systems or a lack of sensors. An advanced drilling model is needed to estimate these parameters and make fast, informed decisions in real time. However, most drilling models used today are recreated multiple times, which requires substantial effort.
In this talk, we will present a prebuilt drilling library created in Simulink® and walk through a two-degrees-of-freedom drilling dynamics model where the differential equations are modeled in MATLAB® and Simulink. We will demonstrate how to set up the initial and operating conditions for simulation. Finally, we will inspect and compare data and simulation results to validate and iterate drilling model designs using the Simulation Data Inspector. This way, we can rapidly explore and implement designs without having to design custom libraries in low-level languages.
Published: 21 Nov 2021
Hello, everyone. Welcome to the CS MATLAB Energy Conference. My name is Rajat Dixit. And I'm a wells engineer in ExxonMobil.
I completed my bachelor's and master's in mechanical engineering. My primary area of expertise is in drill-string dynamics modeling, well performance and well construction activities, and surveillance support. We provide these supports to our global drill teams and keep on helping them in their drilling scenarios throughout the wells.
So today we're going to be talking about in this session one of the drilling simulator that we have created using MathWorks' MATLAB software, and which comprises of two degree of freedom systems, coupled axial torsional motion. And we're just going to be showing you some of the results that's been generated using this model and how that can be utilized further to perform and help the team in the planning phases or in the execution side.
Let me just jump into the content. Before showing you the capabilities of the drilling simulators, I just want to spend a few minutes on explaining how there's a requirement for a new sort of model that can help out in the drilling and tripping operations of pipe.
What are the different scenarios that's been needed for that? So we all know that the oil and gas industry has been there for quite some time. And this particular industry has substantially improved the performance over a period of time based on generating models that are physics-based-- sometimes they're statistical and analytics-based, and also empirical-based-- to provide supports in the dysfunction diagnosis and as well as in the surveillance support.
Now most of these models have been generated out from scratch to make sure there are improvement over the previous generated models. And while creating any new model, it will require significant amount of time, as well as money and energy. ExxonMobil has led to an industry-wide and open source drilling community, which is an initiative led by us and the industry leaders to help reduce and start encouraging on the reuse of the continuously developing models. So that will bring out a repository of all the existing model that the industry thinks can be of use and just provide out at one single repository location.
So subject matter experts can help us in just diagnosing these models to save our valuable amount of times, and just to make sure that there's the right characteristics being generated out of these models. So the area that we're are aiming on this is accuracy, robustness, and the execution durations, both on the computational cost-wise, and then as well as on the execution scale-wise. So the expectation of the leaders is to have high fidelity robust models that can help in the drilling survey and support, help the industry publish these out throughout industry-wide journals and SP conferences to let the others know what we are capable of and what can be utilized down the line. And then there should be a need for industry-wide collaboration on these efforts to resolve the challenges that are ever-growing in the drilling industry and just share out the details on this and keep collaborating on this particular growing scenario.
Moving on to discuss about the current drilling dynamics simulator that we have created. So as already been talked about, we have created this particular model inside MathWorks, MATLAB, and Simulink software. So this is basically a coupled axial torsional two-degrees of freedom systems that helps to understand what's the scenario and dynamics looks like during the pipe tripping and pipe drilling phases.
In this particular models, we have segregated out the entire length of the drill string into separate elements of drill pipe, collars, heavy weights, and drill bits. And then the motion has been provided at the top right in the axial and rotary side. So the axial speeds have been provided using the draw works. And the rotary speed's been provided by the motion of the drum.
In addition to this, we have also incorporated a mud motor-based into the system, which will help us to drill out slide versus rotate mode of drilling. I will talk about the results generated out of this model in later slide. Before that, let me jump into the background physics of how the model has been created and what are the guidelines and assumptions that we have considered while creating this particular model.
So before we jump into the functioning of the drilling simulators, in this particular slide I just want to give you a brief overview how the background modeling of this drilling simulator and the governing physics looks like. So here right at the top is where we are trying to provide our axial speed from the draw works system.
And then, as you can see, there are different elements been laid out in the string. So what we did is, based on the well inclination and the positioning, we segregate our drill string into multiple elements. Now these elements can be a part of drill pipe or heavy weights or collars or drill bit. The bottom-most element that you see here is the drill bit.
Now the connection here that you're seeing are basically on the spring and the damper space. So it's a lump parameter-based study that we are trying to govern.
Now in addition to these things, the dampers value, we are providing force of frictions into the system as well. Now the force of friction will be depending on the borehole friction, which is mainly accounted because of the viscous side, as well as because of the Coulomb friction. So each element needs to break over the static friction so that energy, the diluent process, needs to get transferred to the element below it. And once all the energy has been in continuations, we start to see the dynamics until that energy reaches the pit and the drilling process starts to resume.
Now the forces at the drill bit will be depending strongly on a depth of cut function. And then, in addition to this, there's a dissipation part of it that goes out because of the cutting action.
In this particular slide, so I just want to provide you what are the different forces and the top component that we are accounted while modeling out that drilling simulator. So the forces that we account on the axial sides comprises of the inertia of the elements, the spring forces that are accounting based on the stiffness of those springs. We are also providing fiction-based forces because of the borehole frictions and the Coulomb and viscous part.
And then finally, in the cuttings actions, we need to know what are the reaction forces that are coming from the ground Similarly, in the torsional side, we keep the consistency between those forces. Now, the formation forces will come into play only during the drilling phase. They will not be apart during the tripping phase because the pipe will still be in motion and still off bottom.
This particular parameter, which is the weight on bit, that's the bit will apply or faces, will be depending on a cutting component and on a friction component. So when the drilling process resumes, the rock will start to get cut, which will be accounted by this particular component, and depending on the depth of cut. But there will be some dissipation of energy that this particular component will go on.
Now, there are a lot of parameters for the model tuning that requires to get expected results based on the field data. And those will be all functions of the rock strength, as well as for the hole size that we are actually drilling through. Now, the rock strength that we're providing capabilities from 0 PSI up until 60,000 PSI, so that user can compare out the result between soft, intermediate, and hard rocks. Some additional empirical formulas has also been implemented in the systems to govern out the dynamics and make sure that they match out with the field data.
Now, let's talk about what's the friction model has been account into the system. So once you provide energy from the top drive, it gets transferred to the element below it. Or, we talk about, let's say, the first drill pipe element.
Now that element needs to overcome static friction. There are multiple friction models existing. But for this particular drilling simulator, we are implementing this Stribeck friction model, which will govern the dynamics based on the velocity weakening effect.
And once the element break over their static frictions, then they come into that dynamic zone and transfer the energy to the element below it. As you can clearly see, as a sliding velocity of the element and the system starts to increase, the force of friction starts to come down. And this transitional zone is where you see change or the exponential decay.
And once in the transitional zone, it's only accounted for how the dynamic of the Coulomb friction behaves. The chart below is from the drilling simulator where you can see an additional slope coming out, which is the effects because of the viscous friction come into play, in addition to the Coulomb friction.
Now the force of this particular one is depending on what's the normal loads of each element, and then what's the well inclination of the elements looks like. And after generating out the friction forces of each element, you get an idea how much time it takes for the elements at different positions to start moving now.
Now let's talk about slightly on the part. As I already showed in the drilling simulator, we have induced down-hole mud motor into the system. So this particular chart helps you understand when a down-hole mud motor is placed inside the drill string, we have induced a capability to have slight versus rotate mode of drilling.
The energy to the mud motor has been transferred through the mud pumps flow rate. That's been transferred all the way down to the drill string, and eventually reaching with the mud motor. Once the mud motor has achieved that flow rate, then based on the rotor principle, it gets transferred its fluid energy into the mechanical counterpart and starts rotating the rotor of the mud motor.
Now the rotor's shaft is directly connected to the drill bit, which eventually is going to start rotating out the bit. And that cutting action will resume. So for using the slide mode component, you need not to provide any top drive RPM. You can directly use the mud flow rate to rotate your motor, as well as the bit. But in the rotary mode, both of these actions will be simultaneously placed. And the bit will eventually going to see a combined effect of both.
The reaction torque that's coming out during the cutting actions of this will eventually help us to achieve what's the differential pressure of the motor is going to be seen. And that will be accounted.
One assumption that we have considered in this case, the fluid compressibility effects are not accounted that will generate the pressure pulses. So we just consider the part that, while transferring out from the top drive until the motor, there's a lag that come into the system for this energy transfers to take place. And that's been utilized to generate out the dynamics of the reserves.
Before jumping on to showing you how the model actually works in Simulink, I just want to highlight here some of the capabilities that we have for the drilling simulators. So based on the well part, it provides you the flexibility to segregate your entire drill string into various components, let it be the drill pipes, heavy weight, collars, or the mud motors.
It provide you the flexibility to choose what kind of conditions you want to provide at the top, let it be a steady-state function, let it be a constant function, a ramp function, or a step function. It provides you freedom to have a variety of the rock strength to compare out your results, and the soft versus harder rocks.
It also goes out how the bid plates can be adjusted and what's the positioning of the different blade. It can be symmetric, as well as asymmetric. So a rock cutting action can also be visualized using this particular feature. Apart from that it's providing the capability to trip in hole and drilling cases, so you can always compare all the cases while drilling versus a tripping scenarios, and see how the results will look like, how fast you can trip while in comparison to the drilling actions, and what are the dynamics behind those results.
We have considered the part on this tracking scenario, how the hole is in which phase, whether it's going to be drilling or tripping. So foe that, we always keep a track on what's our hole depth and bit depth position track it looks like, and just govern all the results based on that.
As I already told you, there's a Stribeck friction effect coming into play, which is an exponential non-linear variations of the Coulomb frictions. So that helps us to achieve what will be the energy required to break the static friction as each element of the drill string. And the end, the motor-governing feature help us to utilize different back-off events at the motor that can be used out as a hind casting tool, As well it also provides a capability to observe what's the pipe rocking phenomena.
So in the pipe rocking phenomena, you can transfer that energy at the top drive using the mud flow rate. And then you can govern it out how the mud motor will behave based on that flow rate and just see if you can break out some of the frictions along the length of the rock strength.
And then, in the end, we also provide a capability to the lubrication trial testing capability. So in each element, we governs that you can change out the values of the static and dynamic coefficient of frictions as you play along and see, based on the pipe doping actions. If the friction has been reduced at some elements, how much the effects on our dynamics looks like?
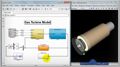
Now let's jump on to show you how the drilling simulator actually works in Simulink. So once you are in the Simulink environment, as I already told you about, the drilling simulator comprises of the coupled effect of the axial torsional.
So we are providing the input in the axial side using the draw works speed. That can be a function of a ramp side. Or it can be a straight line or it can be a sinusoidal curve. And similarly, on the torsional side, we are providing the effects based on the drum speed. And right at the bottom that you see this particular window is where we are trying to provide the mud motor flow rate to the mud motor that's going to be transferring energy to the bit.
Now there are some blocks that you see in the system, like this particular subsystem. So this comprises of the entire drill string, which has been segregated into drill pipe collars and heavy-weight elements. We additionally have this one particular subsystem specifically for our drill bit, which eventually governs out the bedrock interactions, how the reaction forces are varying the dynamics, and how the results have been generated based on different rock strength and surface conditions. The bottom two blocks here that you are seeing are our data inspectors that help us to assess at different value of the top drive conditions that have been provided, how the downhill conditions or the conditions are different elements looks like.
So let me jump into this particular subsystem. So as I already told you, we have created these separate subsystems for the drill pipe, heavy weight, and collar, so providing the flexibility to the user to actually help us go on and understand what is the number of elements he want to segregate the string, and what are the positions of those elements.
So if I just show you inside this subsystem, you see the strain of elements of the drill pipe, from E1 up until E10. So these are 10 drill pipe elements having different lengths and different composition and geometries. And once we have, as I already told you from this chart, each element has been connected with springs and the dampers.
So there will be one force coming out from top that is transferring energy to that particular element. And then once the element breaks it's static friction, it transfers the element to below. So that's why each element has been connected by a few connection wires, comprises of two on the axial side and two on the rotary side.
Once you have this sort of system set up for your entire drill string, we have inside the drill bit elements where a master solver system has been placed, which actually help us to understand how the bedrock interaction looks like, how the surface striking looks like. So once all these conditions has been set into the systems, user just needs to go and apply what conditions he wants to use, what kind of static or fixed step or a variable time step solver he wants to play into.
And now I'm going to be showing you one particular case. We have chosen a rock strength of 2,000 PSI soft rock, and applying some conditions at the top drive in both axial and rotary side, and then how the effects of changing the flow rate of the mud flow will impact the down hole dynamics.
So these particular scenario that you see in this particular charts here is that we get from our data Inspector. The different charts here are showing what's the surface condition that we apply and how the down hole conditions at the bit is going to be changing and seeing the dynamics.
So the first we got here is the tell you out. We simply provide the draw works speed from the top drive and ramp it up to 40 meters an hour in 6 seconds, and then holding it constant.
The second chart where we are providing the drum speed, that will be changing in 0 to 120 in 1 second, and then holding it constant for the remaining of the run.
And the last chart here, you see is where we are trying to apply our mud pumps flow rate. So it ramps up from 0 to 320 gallons per minute in 10 seconds. And then, we hold it for the system to stabilize this. And in the phase 2 of this scenario, what we did is we try to ramp down this mud pump flow rate all the way to 5 gallons per minute, and then try to hold it constant.
Now, this particular effect of the change in mud flow rate will directly be seen in the motor RPM because of the transfer of fluid energy into the mechanical. And then motor will start to see the RPM rise here, up until the 90 meters an hour rise, and then constant, and then following the similar patterns as that of the mud pump flow rate.
Now this particular chart here that you see is what's the drill bit's RPM going to be. So in the early side, there will be some dynamic effects coming out for the system to stabilize and the transfer of energy took from top drive up until the bit. Now at 60 seconds onwards, what we did is we start to reduce the mud pump's flow rate.
Now, the drill bit will be seeing a combined effect of the RPM of the mud motor, as well as that's coming out from the top drive. So its value starts to decay as well. And once it starts to reach out a mark of 120, which is more or less what we provided the top drive, it's going to start to see and eventually going to be holding to a constant value of that.
Now this particular chart here at the bottom side that you see is where our actual velocity of bit is going to be behaving. Now as I already told you earlier, we have implied a Stribeck effect for the Coulomb frictions that allowed each element to break the static friction first before transferring energy to the element below.
And that's why it takes 5 seconds for the drill bit to have the energy it requires to break the static friction, and then starts to move further on for the cutting actions. Once the system stabilizes on the axial side at 60 seconds, because of the change that comes out in the mud pump's flow rate, it reduced down. And since we have both the axial and rotary coupled, there is a drop can be seen in the actual velocity.
Now we have used a softer rock here of 2,000 PSI. And if that's been raised to, let's say, 60,000 PSI or 40,000 PSI, a harder rock, this dip will be much higher than this. And once after we have the dip and the system starts to stabilize this, it eventually reaches out to the surface actual velocity of 40 meters an hour.
Now we also want to show you how the down hole forces and the torques are showing in this particular chart. So what we try to show here is this first chart is showing you how the depth of cut is behaving as we change out our different RPM in the axial velocity into the system. Now, the depth of cut is a strong function of the axial velocity and the RPM. That's why it starts to rise up to the mark and start to eventually settles out.
But at 60 seconds, what we did is we reduce our mud pump flow rate. Now as a result of that, the motor RPM will go down as, well as the bit RPM. And as a result of this, now with lesser value of the RPM we are getting a very high value of the depth of cut in comparison to the previous case. And that's results why you are seeing a 0.22 inch revolutions of depth of cut.
Now a down hole forces at the bit, which is comprises of the weight on bit, as well as the torqued bit, are strong dependency on the depth of cut. And that's why, after 60 seconds, you see as the depth of cut rises, these forces are also following a similar pattern. Now they have a dependency on few additional parameters, like the dissipation energy and how much you are applying to the system. But in this particular side, we are trying to just show you how dependency on the depth of cut can change both axial and the rotary side.
Now on the bottom chart, we are going to show you how much the force that you need to apply to achieve that axial velocity at bit. So in this particular case, this force that you are applying at the top needs to break through the static friction before transferring everything to the bit. And that's why this particular parameter is just showing out.
And since the well that we pick up is near vertical, that is why the variations in the down hole weight on bit and the surface force that we provide is not huge. But if you're talking about an incline well or an extended reach well, this value will be pretty high, because there will be additional drag coming out in the drill string that needs to be overcome. Similarly, on the torque, if you can see, we are applying, and needs to apply, a torque of minimum 8,500. That needs to be accounted for this change.
And in the last shot that we are showing is towards the differential model that needs to be accounted for. So once the rock starts to get cut in the drilling scenario, a reaction torque will be seen by the drill bit. And it gets transferred to the state or assembly of the mud motor.
Now this particular force is clearly showing out that the reaction torque will be a function. And corresponding to that, differential pressure will change. So the eventually settled-out value is clearly 45 PSI in this particular case. Now the rock strength will increase. Corresponding to that, there will be change in the depth of cut and the down hole torque. And this parameter will have dependency on that as well.
So these are some of the outlines that you see while assessing and providing conditions at the top drive and how the dynamics changes out at the bit or along the length of the string.
For any additional information on running of the drilling simulator, you can always contact the open source drilling community, or as Now I'm pretty much open if anyone in the audience would like to ask us questions.
Featured Product
Simulink
Up Next:


Related Videos:


Select a Web Site
Choose a web site to get translated content where available and see local events and offers. Based on your location, we recommend that you select: United States.
You can also select a web site from the following list
Americas
- América Latina (Español)
- Canada (English)
- United States (English)
Europe
- Belgium (English)
- Denmark (English)
- Deutschland (Deutsch)
- España (Español)
- Finland (English)
- France (Français)
- Ireland (English)
- Italia (Italiano)
- Luxembourg (English)
- Netherlands (English)
- Norway (English)
- Österreich (Deutsch)
- Portugal (English)
- Sweden (English)
- Switzerland
- United Kingdom (English)