Prepare System for Conversion
Before using the Fixed-Point Tool to generate data type proposals for your model, set up your model in Simulink® and prepare the system for conversion.
Set Up the Model
Specify Design Ranges
If you are using design minimum and maximum range information, add this information to the blocks. To autoscale using derived data, you must specify design minimum and maximum values on at least the model inputs. The range analysis tries to narrow the derived range by using all the specified design ranges in the model. The more design range information you specify, the more likely the range analysis is to succeed. As the analysis is performed, it derives new range information for the model and then attempts to use this new information together with the specified ranges to derive ranges for the remaining objects in the model. For this reason, the analysis results might depend on block priorities because these priorities determine the order in which the software analyzes the blocks.
You specify a design range for model objects using parameters such as Output minimum and Output maximum. For a list of blocks in which you can specify these values, see Blocks That Allow Signal Range Specification.
Enable Signal Logging
To view simulation results using the Simulation Data Inspector, you must enable signal logging for the system you want to convert to fixed point. You can choose to plot results using the Simulation Data Inspector only for signals that have signal logging enabled.
In the Simulink Editor, select one or more signals.
In the Signal tab of the Simulink Editor, click Log Signals.
Use Lock Output Data Type Setting
You can choose to lock some blocks against automatic data typing by selecting the block's Lock output data type setting against changes by the fixed-point tools parameter. If you select this parameter, the tool does not propose data types for the block.
Update the Diagram
Update the diagram to perform parameter range checking for all blocks in the model.
If updating the diagram fails, use the error messages to fix the errors in your model. After fixing the errors, update the diagram again. If you cannot fix the errors, restore your backup model.
Select the System Under Design
To open the Fixed-Point Tool, in your model, in the
Apps gallery, select Fixed-Point Tool.
Alternatively, use the fxptdlg function.
In the Fixed-Point Tool, click New and select
Iterative Fixed-Point Conversion.
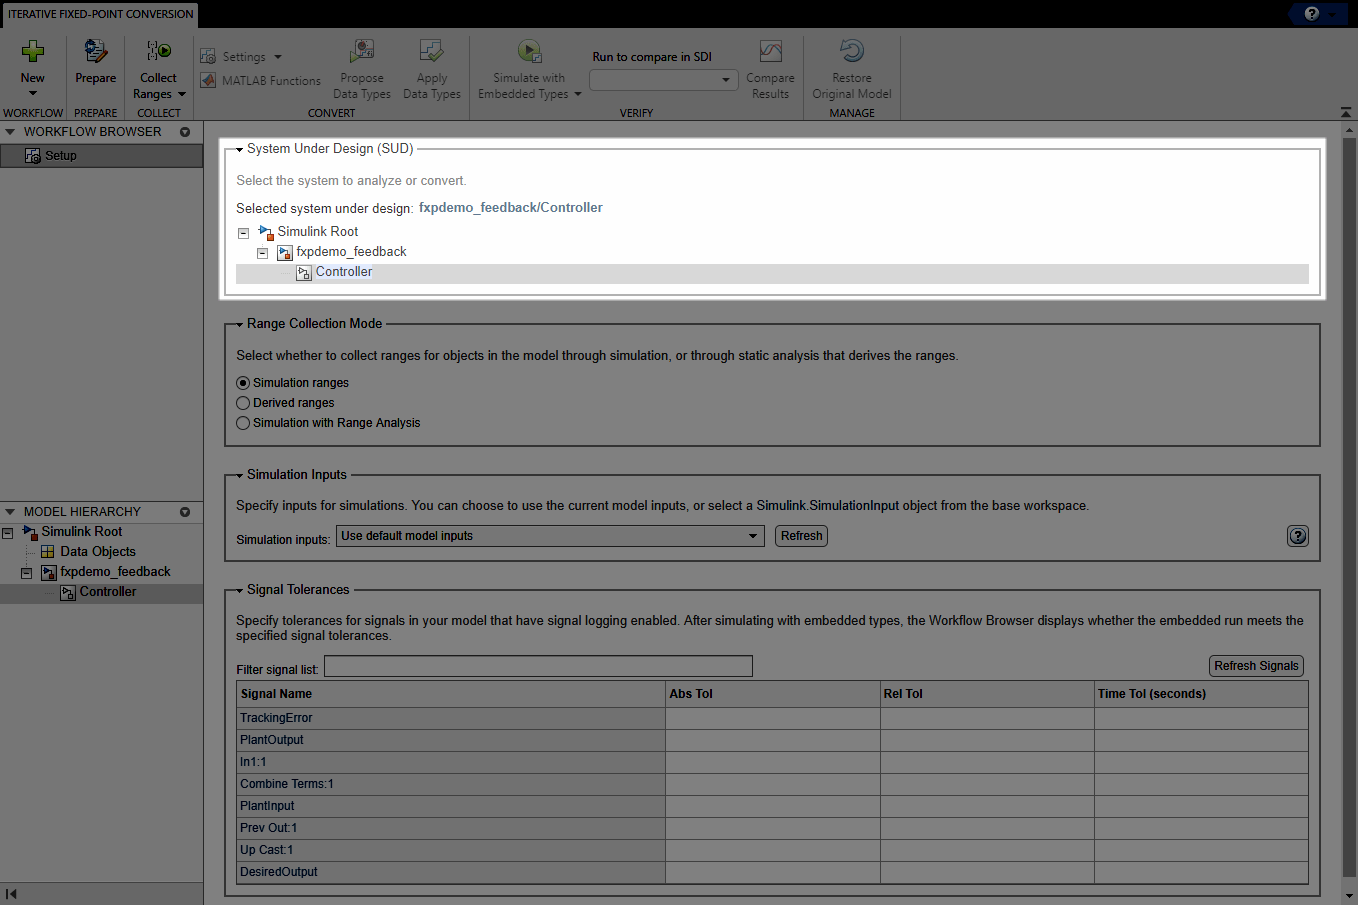
Select the system or subsystem you want to convert to fixed point. Convert individual subsystems in your model one at a time. This practice facilitates debugging by isolating the source of numerical issues.
In the main working area, under System Under Design (SUD), use the drop-down menu to select the system or subsystem you want to convert.
Set Range Collection Method
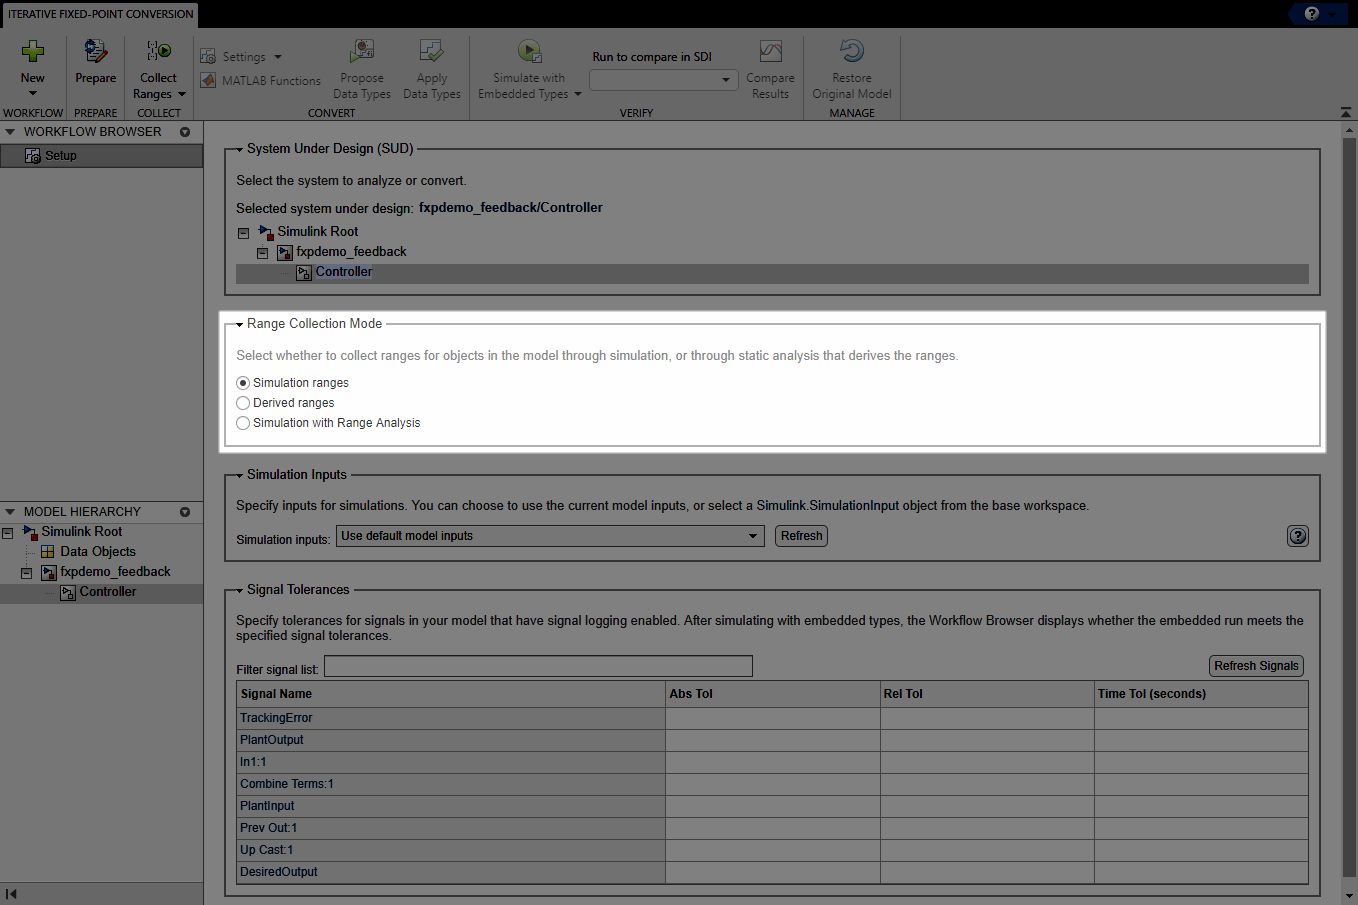
You can collect ranges through simulation, derived range analysis, or by using simulation combined with derived range analysis. Using simulation-based range collection, the Fixed-Point Tool can be configured to perform a global override of the fixed-point data types with double-precision or single-precision data types, thereby avoiding quantization effects. This setting provides a floating-point benchmark that represents the ideal output. You can also collect benchmark range data using the current data type override set on the model.
If you collect ranges through simulation, you can choose to specify additional simulation inputs. During the range collection simulation, the Fixed-Point Tool captures the minimum and maximum values from each specified simulation scenario. For more information, see Specify Simulation Input.
Using derived range analysis, the Fixed-Point Tool uses design ranges specified on blocks to analyze and derive static ranges for other objects in your model. The tool uses all design range information specified on the model to derive ranges for objects in the system under design. If you choose to collect ranges for objects in your model through derived range analysis, you do not need to simulate the model. However, to compare floating-point and fixed-point behavior using the Simulation Data Inspector, simulation is required.
Using simulation with range analysis, the Fixed-Point Tool uses the union of the ranges collected through simulation and derived range analysis.
Under Range Collection Mode, select the method that you want to use to collect ranges. The Fixed-Point Tool uses these collected ranges to later generate data type proposals.
For more information on deciding which method of range collection is right for your application, see Choosing a Range Collection Method.
Specify Simulation Input
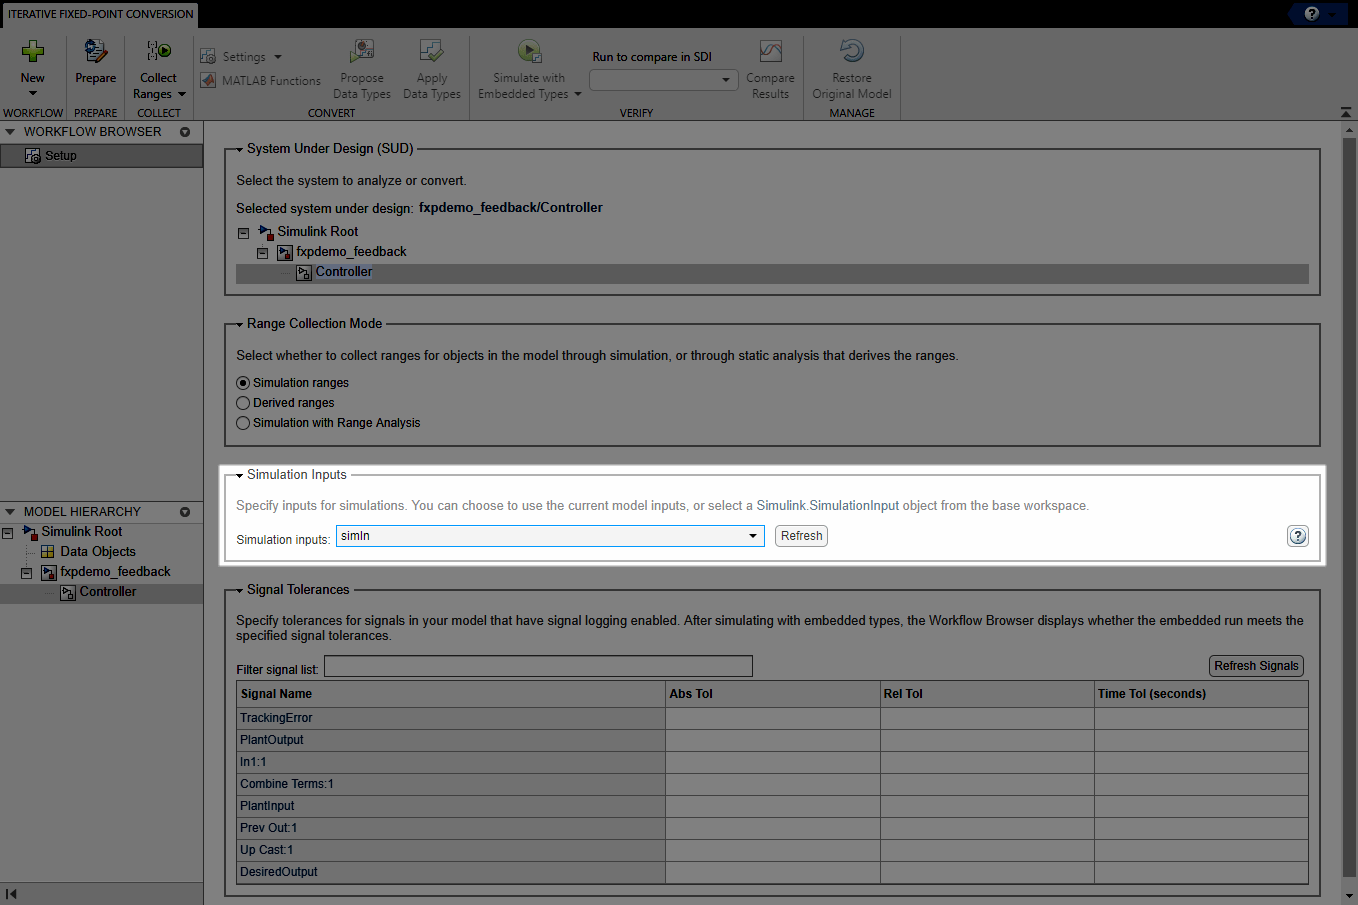
If you choose to collect ranges through simulation, you must specify the simulation
input for your system. Under Simulation Inputs, select whether to use
the default model inputs to simulate the model for range collection, or select a Simulink.SimulationInput object from the base workspace to specify one or more
simulation scenarios.
If the SimulationInput object that you select contains more than one
simulation scenario, the Fixed-Point Tool proposes data types based on the
merged ranges from all simulation scenarios. Because the proposals provided by the
Fixed-Point Tool are as good as the test bench provided, a comprehensive set
of input signals that exercise the full range of your design will result in more accurate
data type proposals for your system. For an example, see Propose Data Types for Merged Simulation Ranges.
Edit Signal Tolerances
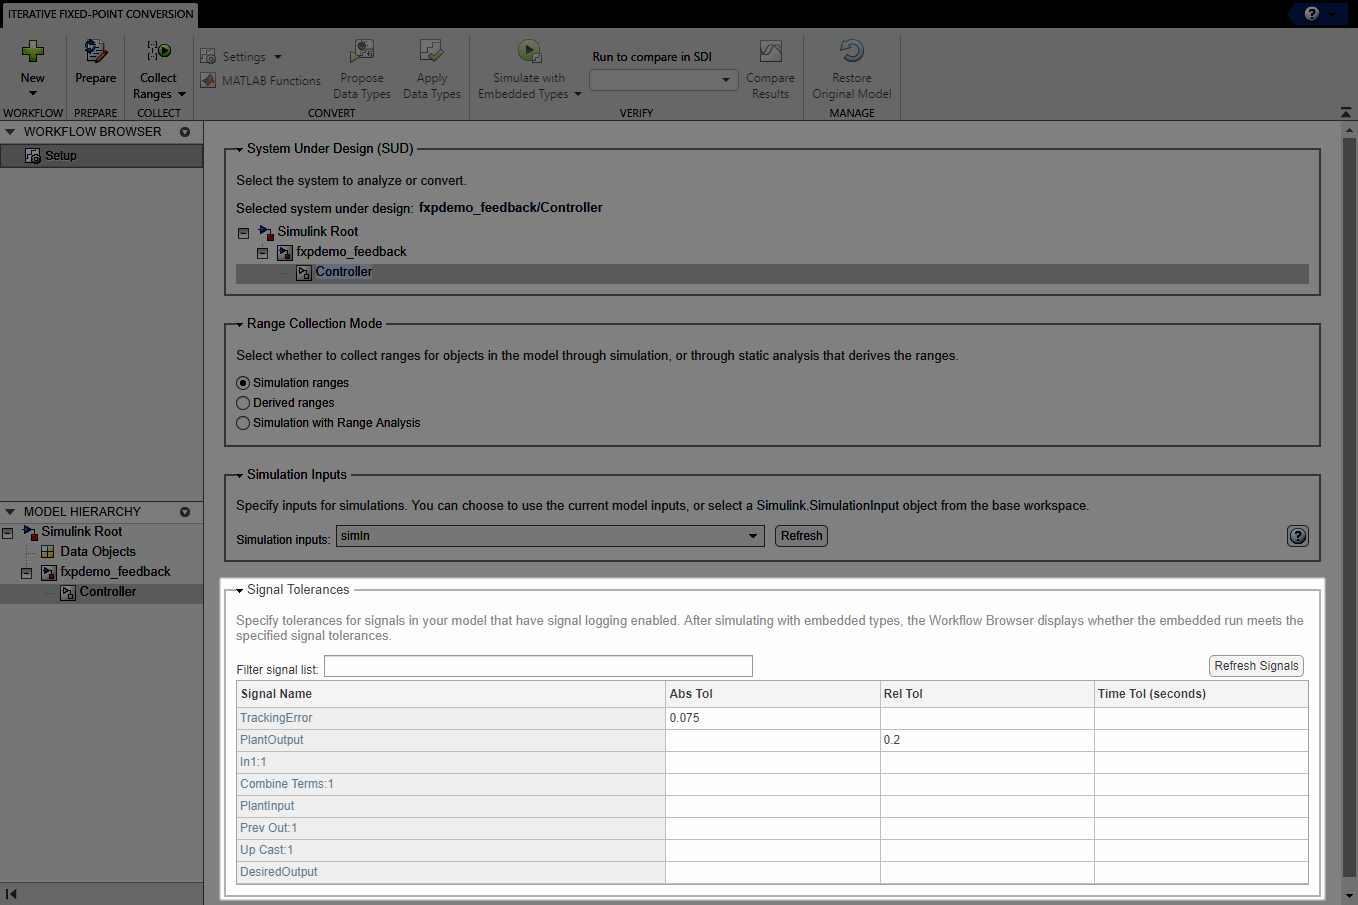
You can specify absolute, relative, and time tolerances for signals in your model that have signal logging enabled. After converting your system, when you simulate the embedded run, the Workflow Browser displays whether the embedded run meets the specified signal tolerances compared to the baseline run established during range collection. You can view the comparison plots in the Simulation Data Inspector.
Specify signal tolerances in the table under Signal Tolerances. The table contains all signals in the model with signal logging enabled. In the boxes to the right of the signal for which you want to register a tolerance, enter the tolerances for the signal. You can specify any of the following types of tolerances.
Abs Tol – Absolute value of the maximum acceptable difference between the original signal, and the signal in the converted design.
Rel Tol – Maximum relative difference, specified as a percentage, between the original output, and the output of the new design. For example, a value of
1e-2indicates a maximum difference of one percent between the original signal values, and the signal values of the converted design.Time Tol (seconds) – Time interval, in which the maximum and minimum values define the upper and lower values to compare against.
For more information, see Specify Behavioral Constraints.
Prepare the System for Conversion
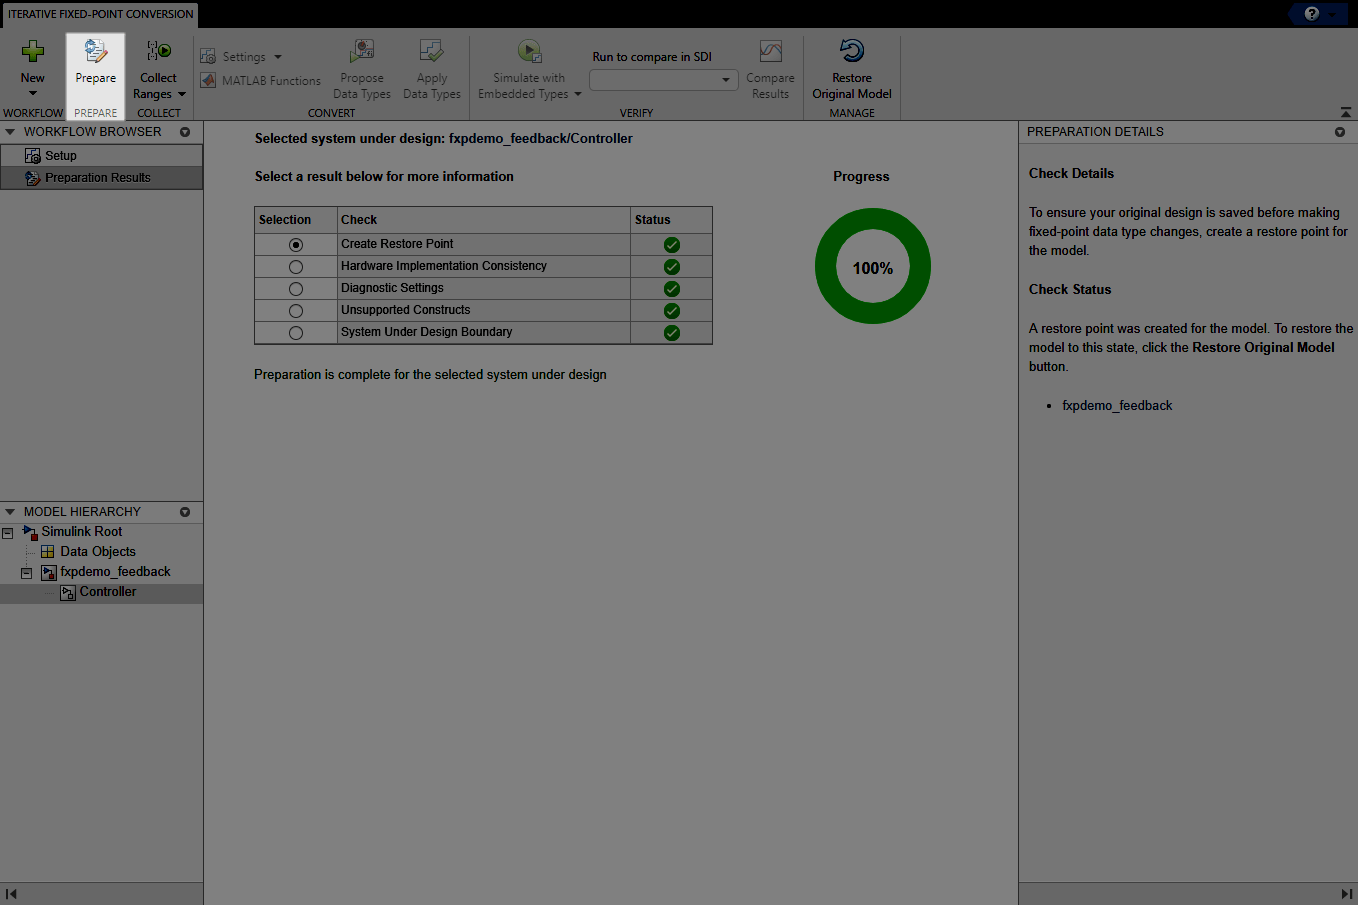
Click the Prepare button. The Fixed-Point Tool creates a backup version of the model and checks the system under design and the model containing the system under design for compatibility with the conversion process.
When possible, the Fixed-Point Tool automatically changes settings that are not compatible. In cases where the tool is not able to automatically change the settings, it notifies you of the changes you must make manually to help the conversion process be successful. For more information about preparation checks, see Use the Fixed-Point Tool to Prepare a System for Conversion.
To learn about the next step in the conversion process, see Collect Ranges.