Label Pixels for Semantic Segmentation
The Image Labeler, Video Labeler, Ground Truth Labeler (Automated Driving Toolbox), and Medical Image Labeler (Medical Imaging Toolbox) apps enable you to assign pixel labels manually. Each pixel can have at most one pixel label. The labels are used to create ground truth data for training semantic segmentation algorithms.
Start Pixel Labeling
Begin by loading an image, video, or image sequence into a labeling app and define pixel ROI labels. For more details, see:
Image Labeler — Get Started with the Image Labeler
Video Labeler — Get Started with the Video Labeler
Ground Truth Labeler — Get Started with Ground Truth Labeling (Automated Driving Toolbox)
Medical Image Labeler — Get Started with Medical Image Labeler (Medical Imaging Toolbox)
Note
This example shows pixel labeling of an image using the Image Labeler. You can use the Video Labeler or Ground Truth Labeler to label videos and image sequences and the Image Labeler for a collection of images.
Select a pixel label definition from the ROI Label Definitions pane. A Label tab opens, containing tools to label pixels manually using polygons, brushes, or flood fill. You can use the labeling tools in any order. This tab also has controls to adjust the display of the image by zooming and panning and to adjust the opacity of the labels.
This example shows strategies to label pixels in the highway image:
Use the Segment Anything Model (SAM) to automatically segment regions in an image.
Use semi-automated tools, such as Flood Fill, Superpixel, and Smart Polygon. Then, refine the labels using tools that offer more direct control, such as Polygon, Assisted Freehand and Brush.
Label Pixels Using Segment Anything Model (SAM)
Use the Segment Anything tool to rapidly label some or all objects in an image using the Segment Anything Model (SAM). The SAM is a state-of-the-art image segmentation model that uses deep learning neural networks to accurately and instantaneously segment objects within images without requiring training. Use the SAM to segment object regions to label with just a few clicks, or automatically segment the entire image and instantaneously create labels for selected regions. To learn more about pixel labeling using the SAM, see the Automatically Label Ground Truth Using Segment Anything Model example.
Label pixels using Segment Anything in three ways:
On the Label tab of the app toolstrip, in the Segment Anything section, select Bound Object. Draw an ROI around an object to segment, and click on the object to segment it.
In the Segment Anything section, select Mark Object. Click on the object to segment once, or as many times as needed until you are satisfied with the segmentation.
Continue to label objects in the scene by marking new object points. Label regions object-by-object, and press Enter, or click Accept after you are done segmenting each object.
To remove regions from your segmented object, or refine segmented object boundaries, right-click or select Mark Background, and click, to mark red points on image areas extraneous to the object.
To automatically segment the entire image into regions and select regions to add to the label, in the Segment Anything section, select Segment Full Image. Click on the highway regions to assign a label to them.
Using this process, you can rapidly assign ROI labels to many regions while Segment Full Image is selected. For example, you can create more label definitions, and click on regions to assign the labels.
Label Pixels Using Flood Fill Tool
The Flood Fill tool labels a group of connected pixels that have a similar color. In this image, the sky is a good candidate for flood fill because the boundary of the bright sky is clear against the dark vegetation and overpass. In contrast, flood fill cannot isolate the vegetation because the color of the vegetation is too similar to the adjacent barriers, roads, and vehicles.
To label pixels using Flood Fill:
Select Flood Fill and a label. The pointer changes to a paint can
 .
.Click a starting pixel in the image.

You can undo the flood fill, or any other labeling operation, by pressing Ctrl+Z.
Label Pixels Using Superpixel Tool
The Superpixel tool labels sections of adjustable-sized grids of pixels. It enables you to quickly define objects in the scene. The Superpixel tool appears in the toolstrip after you create a pixel label definition.
To label pixels using Superpixel:
Select the Superpixel tool from the toolstrip. The app creates a super pixel grid layout over the image. You can change the grid resolution using the Grid Count slider.
Select a predefined pixel label definition and then left-click a grid to select it. The color of the grid changes to match the color of the pixel label you selected. You can select multiple grids by left-clicking each grid or by holding down the left mouse button and move the pointer continuously. Use the refining tools to modify the selection at any time during labeling.

Modify the Grid Count, while you are labeling, as needed to best capture an area. For example, to label large areas, lower the grid count. To more accurately capture the edges of an area, increase the grid count.

Label Pixels Using Smart Polygon Tool
The Smart Polygon tool estimates the shape of an object of interest within a polygon that you draw. The tool is useful when the shape of the object is not a simple polygon. This example uses Smart Polygon to label the vegetation, which has a complicated boundary with the sky.
To label pixels using Smart Polygon:
Select the tool and a label. The pointer changes to a crosshair
 .
.Click to add polygon vertices. Completely surround the object of interest, with some space between the object and the polygon.
Close the polygon by clicking the first vertex after placing the other vertices. Alternatively, you can double-click to add the last vertex and close the polygon in one step.
After you close the polygon, the tool draws an initial label.
Adjust the shape and position of the polygon. When the object of interest extends to the edge of the image, drag vertices to the edge of the image to ensure that the smart polygon completely encloses the object. For instance, this example shows the two leftmost vertices placed at the left edge of the image.

Smart Polygon Actions
Goal Control Move vertex Click and drag the vertex. Add vertex Right-click the polygon boundary at the position of the new vertex, and select Add Point.
Double-click the point on the boundary.
Delete vertex Right-click the vertex and select Delete Vertex. Move polygon Click and drag any point on the polygon boundary (excluding vertices). Delete polygon Right-click the polygon boundary and select Delete Polygon. Use the Smart Polygon Editor tools to refine the label.
Select Mark Foreground to mark areas inside the region that you want to label. Foreground marks appear in green.
Select Mark Background to mark areas inside the region that you do not want to label. Background marks appear in red.
Select Erase Marks to remove foreground or background marks that are no longer needed.
See Tips for additional suggestions on using the Smart Polygon tool.

To finalize the label, press Enter or select a new label from the ROI Labels pane. You can no longer edit the polygon vertices or mark foreground and background regions.
Label Pixels Using Polygon Tool
The Polygon tool labels all pixels within a polygon that you draw. The controls for defining and adjusting the vertices of a polygon are similar to the controls of the Smart Polygon tool.

Add additional polygons over structures such as barriers and the road. Many vehicle pixels are incorrectly labeled. The next step shows how to replace the erroneous labels with the correct label.

Label Pixels Using Assisted Freehand Tool
The Assisted Freehand tool enables you to draw an ROI that automatically follows the edge of the subject in the underlying image. You can also adjust the size and position of the ROI by using your mouse.

Replace Pixel Labels
Each pixel can have at most one pixel label. When you apply a label to a pixel, the new label replaces the previous label.
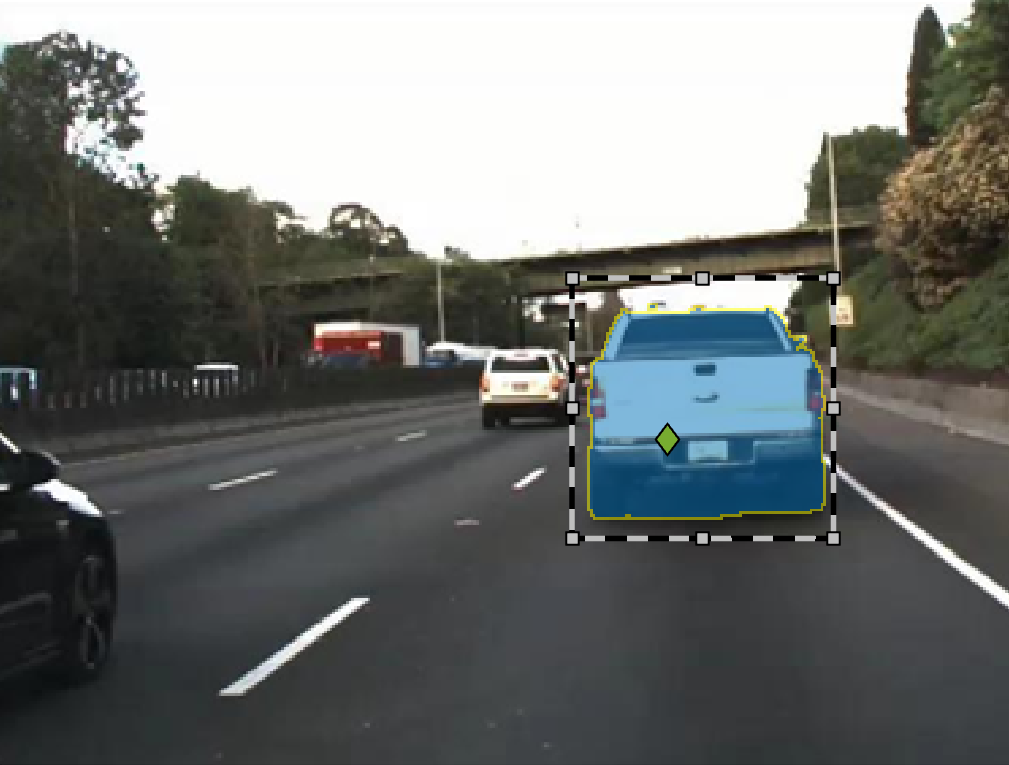
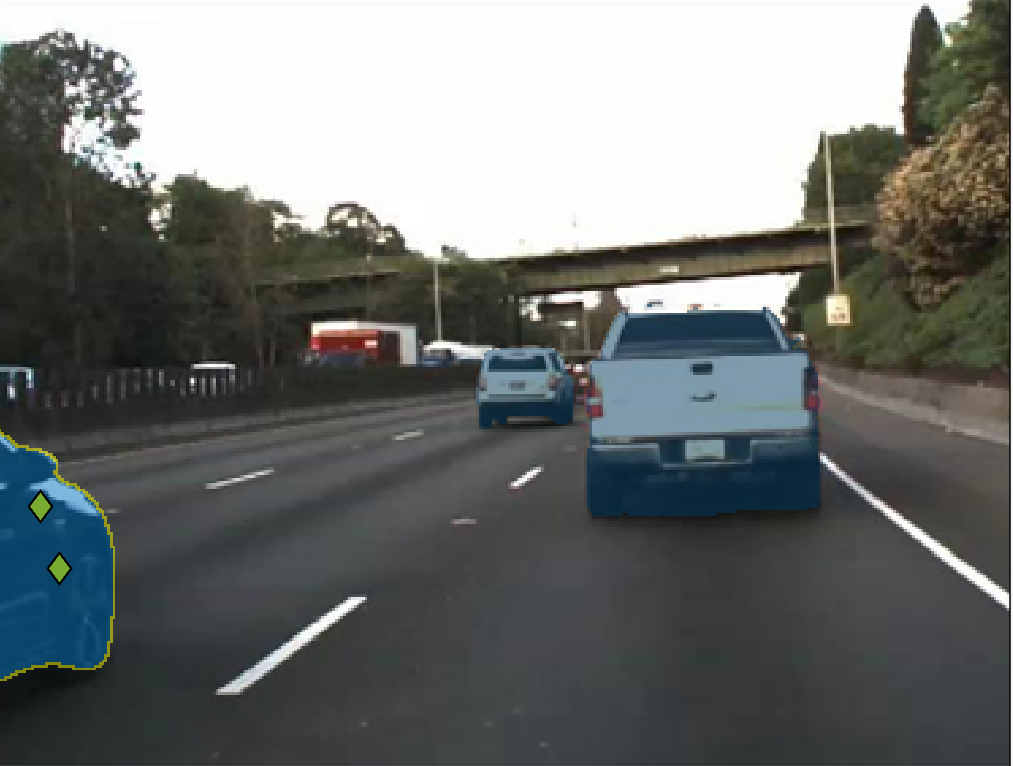
This example uses the Smart Polygon tool to label pixels belonging to the truck. Foreground marks assign the vehicle label to subregions. Background marks revert subregions to their prior label. For instance, in the first pair of images, background marks revert subregions to the sky and vegetation labels. Similarly, in the second pair of images, background marks revert subregions to the road label.

The border of the truck is jagged because Smart Polygon labels entire subregions, not individual pixels. The next step shows how to refine the labels along the border of the truck.
Refine Labels Using Brush Tool
The Brush tool labels pixels when you draw over the image with the mouse. This example uses Brush to remove spurs from the road and to make the edges of the truck smoother.
To label pixels using Brush:
Select the tool and a label. The pointer changes to a pen
 , and a square appears to indicate the
size of the brush.
, and a square appears to indicate the
size of the brush.Adjust the size of the brush by using the Brush Size slider.
Click and drag the mouse to label pixels.

The Erase tool removes pixel labels when you draw over the image with the mouse.
Visualize Pixel Labels
You can modify the view of the image to facilitate pixel labeling. The Zoom In, Zoom Out, and Pan options enable you to zoom and pan the image with the mouse. To resume pixel labeling, click the Label icon.
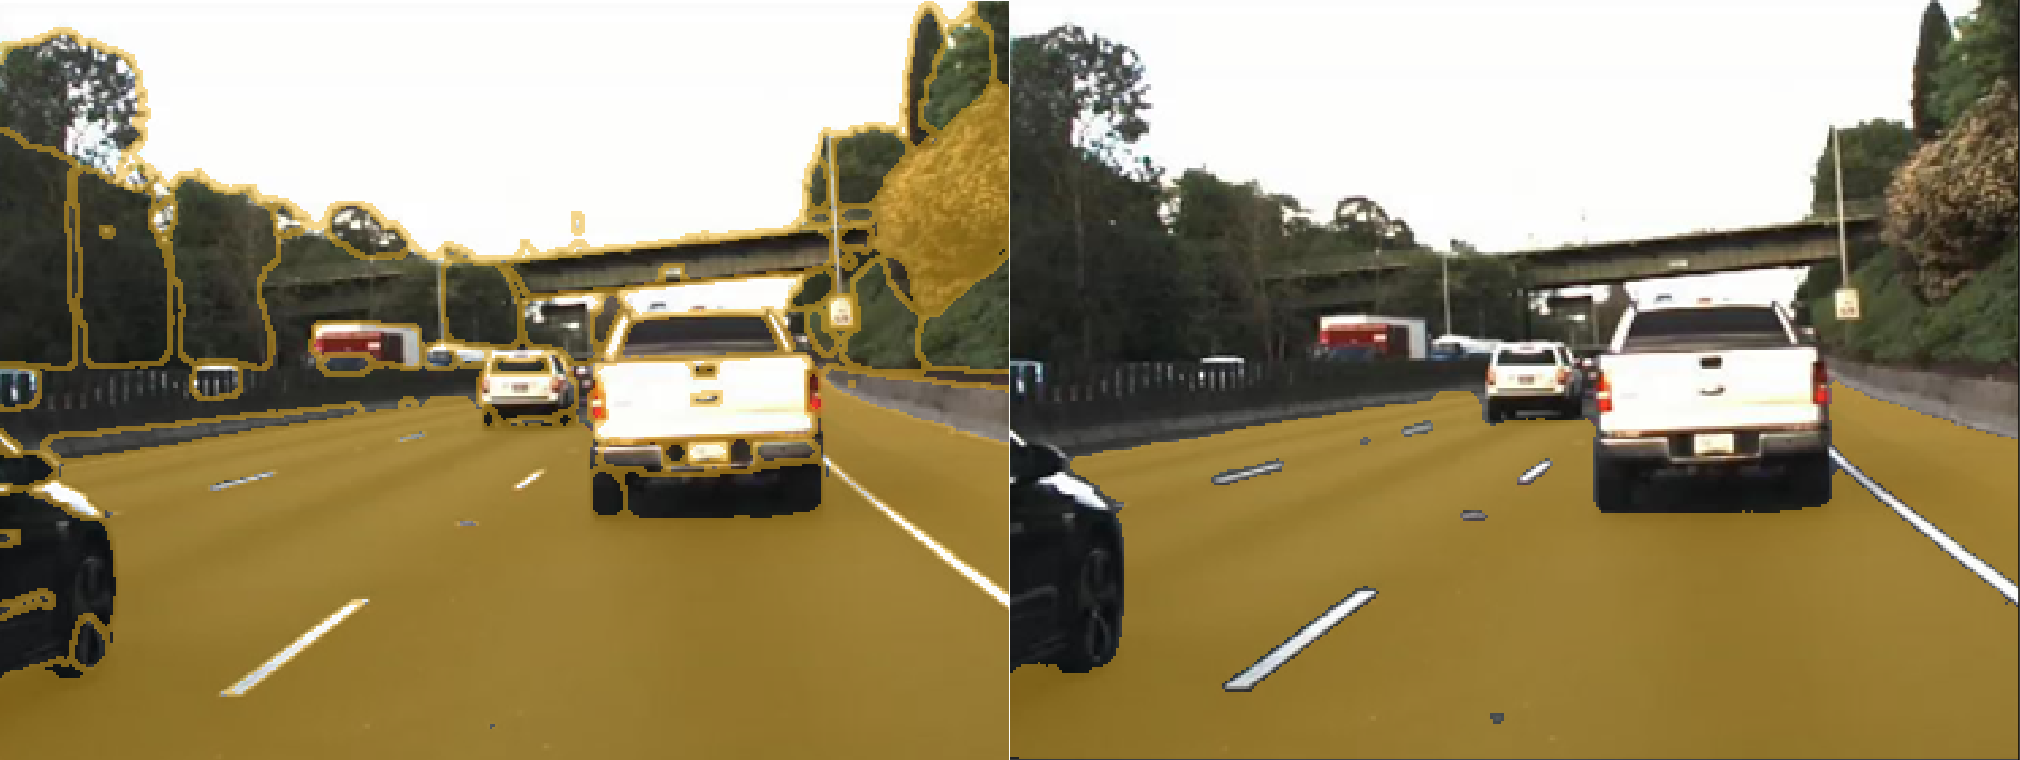
The Label Opacity slider adjusts the opacity of all pixel labels.
Decrease the opacity to see the image more clearly. For instance, decrease the opacity to make it easier to find the border between the bottom of the car and the road.
Increase the opacity to see the segmentation more clearly. For instance, increase the opacity to see that edge along the front bumper of the car should be smoothed. Also, observe that the barrier and some distant vehicles have unlabeled pixels.

This is the final pixel-labeled image.

Tips
The Smart Polygon tool identifies an object of interest by using regional graph-based segmentation ("GrabCut") [1]. The Smart Polygon tool divides the image into subregions. The tool treats all subregions that are fully or partially outside the polygon as belonging to the background. Therefore, to get an optimal segmentation, make sure the object to be labeled is fully contained within the polygon, surrounded by a few background pixels.
All pixels within a subregion have the same label. Marking pixels outside the polygon has no effect on the label.
To delete the most recently labeled ROI, press Ctrl+Z. To delete all pixels in a frame, press Ctrl+Shift+Delete.
To cut or copy all pixels in a frame, press Ctrl+Shift+X or Ctrl+Shift+C. To paste the cut or copied pixels, press Ctrl+Shift+V.
Each pixel can have at most one pixel label. When you apply a label to a pixel, the new label replaces the previous label.
Pixel labeling is disabled when you pan and zoom the image. You must click the Label button to resume pixel labeling.
To ensure that all pixels in an image are labeled, begin by labeling the entire image with a single label. Pick a label that represents a predominant ROI in the image, such as sky, road, or background. Then, use the labeling tools to relabel objects with their correct label.
To fill all or all remaining pixels, select an ROI label from your list and press Shift+Click (you can use left- or right-click).
References
[1] Rother, C., V. Kolmogorov, and A. Blake. "GrabCut - Interactive Foreground Extraction using Iterated Graph Cuts". ACM Transactions on Graphics (SIGGRAPH). Vol. 23, Number 3, 2004, pp. 309–314.
See Also
Image Labeler | Video Labeler | Ground Truth Labeler (Automated Driving Toolbox) | Medical Image Labeler (Medical Imaging Toolbox)
Topics
- Get Started with the Image Labeler
- Automatically Label Ground Truth Using Segment Anything Model
- Get Started with the Video Labeler
- Get Started with Ground Truth Labeling (Automated Driving Toolbox)
- Get Started with Medical Image Labeler (Medical Imaging Toolbox)
- How Labeler Apps Store Exported Pixel Labels